

Anyone who’s ever moved will tell you the same thing: packing the kitchen is the absolute worst part. It’s not just about throwing things in boxes. It’s a delicate operation of decluttering what feels like a million items, gathering the right supplies for everything fragile, and then methodically working your way through every last cabinet, drawer, and pantry shelf. Get it right, and you turn the most dreaded room into a totally manageable project.
The Orlando Kitchen Packing Challenge
Packing a kitchen is tough anywhere, but doing it here in Orlando brings its own unique flavor of chaos. This isn't just about wrapping plates; it's a strategic mission that really benefits from some local know-how.
Whether you're moving from a charming historic bungalow in Winter Park to a sleek high-rise in Thornton Park, or leaving a sprawling family home out in Lake Nona, the core challenge is the same: the sheer volume of stuff that is fragile, heavy, and just plain awkward to pack.
This guide is written specifically with Orlando residents in mind. We're not just tossing out generic tips you could find anywhere. We’re sharing a battle-tested plan, one built from years of hands-on experience right here at Family Movers Express. Our crews know the little things that make an Orlando move different—from picking packing materials that won’t get soggy in the Florida humidity to planning the truck route around the beautiful mess that is I-4 traffic.
Think of this as your personal playbook for conquering the kitchen move. We’ll walk you through everything you actually need to know:
- Decluttering with a purpose: How to really thin out your cabinets and pantry to make your life easier (and your move cheaper).
- Getting the right gear: Why professional-grade boxes and paper make a huge difference, especially during a hot, humid summer move.
- Protecting your breakables: Proven techniques to make sure every dish, glass, and gadget arrives at your new place in one piece.
The real goal here is to transform kitchen chaos into an organized, stress-free process. The secret is simple: start early and follow a clear plan that accounts for the realities of moving in Central Florida.
Too many people completely underestimate how much time and effort the kitchen takes. It almost always leads to a last-minute panic. We've seen it a hundred times—people scrambling the night before we arrive, tossing family heirlooms into flimsy boxes with a few t-shirts for padding. That's a recipe for broken dishes and a frustrating start in your new home.
Our approach, honed over countless moves in neighborhoods from Windermere to Celebration, is all about preparation and technique. Follow our advice, and you won’t just be protecting your belongings; you'll be making the entire moving day go smoother for you and your movers.
And if you get halfway through and realize it's just too much to handle? Our team of professional Orlando movers is always ready to jump in and take it off your plate. This guide will give you the confidence to either tackle it yourself or understand exactly what you're getting when you hire the pros.
Your Orlando Kitchen Packing Blueprint
A smooth move out of your Windermere home or Celebration apartment doesn't just happen by accident. It's the result of a deliberate, well-timed plan. The absolute key is to start weeks in advance, transforming what feels like a monumental task into manageable, bite-sized pieces. This is the exact blueprint our Family Movers Express teams use across Central Florida, and it's designed to help you bypass that last-minute, everything-is-chaos panic.
The whole process kicks off long before you even touch a roll of packing tape. It starts with a smart purge and gathering the right supplies for the job.
4-Week Orlando Kitchen Packing Timeline
Tackling the kitchen requires a game plan. Trying to do it all in the final days is a recipe for stress and broken dishes. We've found that breaking it down into a weekly schedule makes the entire process feel less overwhelming and far more organized. Here’s a timeline we recommend to our Orlando-area clients to keep things on track.
| Week Before Move | Key Tasks | Local Pro-Tip (Orlando Focus) |
|---|---|---|
| Week 4 | The Great Purge: Go through every cabinet, drawer, and pantry shelf. Sort everything into "Keep," "Donate/Sell," and "Toss" piles. Be ruthless—if you haven't used it in a year, let it go. | Drop off good-condition items at a local Orlando charity like The Russell Home or a neighborhood Second Harvest Food Bank donation spot. It’s less to move and helps the community. |
| Week 3 | Gather Supplies & Pack Non-Essentials: Purchase quality boxes, packing paper, and tape. Start packing items you rarely use: fine china, holiday dishes, specialty gadgets, and vases. | Florida humidity can weaken cheap cardboard. Don't skimp on supplies. Visit a local moving supply store instead of a big-box retailer for better quality, double-walled boxes. |
| Week 2 | Pantry & Cookbooks: Go through your pantry and start using up perishable items. Pack all non-perishable canned and boxed goods. Pack cookbooks, recipe binders, and wall decor. | This is a great time to plan your "eat-down-the-pantry" meals. You’ll save money on groceries and avoid moving half-empty boxes of pasta or cereal across town. |
| Week 1 | Pack Remaining Items & Prep Essentials Box: Pack all remaining dishes, pots, and pans, leaving only what you need for the last couple of days. Prepare your "Open First" box. | By now, you should be using paper plates. It feels like camping, but it saves you from washing and re-packing dishes right before the movers arrive at your Lake Nona or Dr. Phillips home. |
By following a simple schedule like this, you methodically break down the most intimidating room into a series of achievable tasks. You'll feel more in control, reduce waste, and set yourself up for a much smoother transition into your new Orlando home.
Four Weeks Out: The Great Orlando Purge
The first and most impactful step is decluttering. This isn't just about making the packing job easier; it's about physically reducing the amount of stuff you have to move, which saves you time, money, and a whole lot of hassle. Trust us, a lighter load is always a better load, especially if you're navigating I-4 traffic during rush hour.
Start by pulling everything out of your cabinets, drawers, and pantry. You need to see it all. Then, create three distinct zones: Keep, Donate/Sell, and Toss.
This initial purge is your best defense against waste. You might be surprised to learn that kitchen packing is a huge contributor to landfill waste nationwide. The stats are staggering: Americans use about 90 million pounds of packing paper and 30 million rolls of tape for moves each year. A huge chunk of that is used on items that probably should have been discarded in the first place, with DIY movers tossing out an incredible 8.4 million tons of junk annually.
For a typical Orlando home, you could easily be sorting through 200-300 individual kitchen items. Realistically, you can expect to get rid of 30-40% of them. If you want to see the bigger picture, you can find more moving industry statistics and trends online.
Three Weeks Out: Assembling Your Toolkit
With your kitchen officially streamlined, you now know exactly what you need to move. It's time to gather professional-grade supplies. This is not the place to cut corners—the Florida humidity is no joke and can weaken cheap cardboard and tape, leading to disastrous box failures.
Here's your essential checklist:
- Small & Medium Boxes: Heavy things like canned goods, small appliances, and cookbooks belong in small boxes. Lighter items like Tupperware and baking tins can go in medium ones.
- Dish Pack Boxes: These are non-negotiable. They are heavy-duty, double-walled boxes, often with cardboard dividers, built specifically to protect plates, glasses, and stemware.
- Packing Paper: Be generous with this. It's much better for wrapping individual items than newspaper, which can leave messy ink stains all over your dishes.
- Bubble Wrap: Save this for your most fragile and delicate pieces—things like crystal, fine china, and glass bakeware.
- Quality Packing Tape: Buy more than you think you need. You'll be using it to build the bottom of every box and seal the top securely.
- Markers & Labels: Clear, bold labeling is your single best friend on unpacking day. No exceptions.
Once you have your supplies, start packing the things you use the least. Think specialty gadgets (that pasta maker you used once), fine china, holiday-themed platters, and any decorative pieces. This early start builds momentum and clears out space, making that final week's push feel so much less chaotic. For a deeper dive into this strategy, check out our guide on how to pack for a move efficiently.
Pro-Tip from Family Movers Express: As you pack these early boxes, don't seal them up just yet. Keep a running inventory list for each box in a notebook or on your phone. This makes it a breeze to find that one specific serving platter if plans change, and it will be an absolute lifesaver when you start unpacking.
The Final Week: The Main Event
This is go-time. The bulk of the packing happens now. By this point, you should be down to only the essential items you use every single day. Work systematically through your kitchen, one area at a time. We always recommend tackling drawers first, then cabinets, and saving the pantry for last.
As you pack, make sure to set up an "Open First" box. This is your survival kit for the first 24-48 hours in the new place before you're fully unpacked.
Your "Open First" box should have:
- The coffee maker and supplies (this is non-negotiable for most people!)
- A couple of plates, cups, and sets of silverware
- Dish soap, a sponge, and a dish towel
- Paper towels and trash bags
- A few basics like a small pot, a knife, and a cutting board
Packing Your Most Fragile Kitchen Items
This is where the real work starts. It’s also where professional techniques can save you a world of heartache. We’ve seen it all, from moves in downtown Orlando high-rises to sprawling Winter Park bungalows, and we can tell you that handling fragile items isn’t just about wrapping them up. It’s a whole system designed to absorb shock and stop things from shifting around.
Think about it: every plate, every wine glass, every single item has a weak point. Our entire goal is to protect those points. A sudden stop on I-4 or even the constant vibration of the road can be enough to cause damage if things aren't packed just right.
The Vertical Packing Method for Plates and Bowls
The biggest mistake we see DIY movers make is stacking plates flat in a box, just like in a cabinet. This puts an incredible amount of pressure on the plates at the very bottom. One little bump, and you can get a fracture that spiderwebs through your entire set.
The professional way? Pack them on their sides, like records in a crate.
- Build a Cushion Base: Start with a good 6-inch cushion of crumpled packing paper at the bottom of your dish pack box. This is your shock absorber.
- Wrap Individually: Lay a plate in the center of a stack of packing paper. Pull a couple of sheets over the top, then fold in the sides. Do this for every single plate.
- Place Vertically: Now, slide the wrapped plates into the box on their edges. You want them to be snug but not jammed in tight.
- Fill the Gaps: Once you have a row, stuff crumpled packing paper into all the empty spaces. The goal here is zero movement. If you can gently shake the box and feel anything shift, you need more padding.
For bowls, the technique is similar. Wrap them one by one, then nest two or three together with a sheet of paper between each. Then, wrap that entire bundle again and place it in the box on its side. It’s a simple trick that has saved countless sets of dinnerware on moves across Central Florida.
This simple workflow gives you a visual for the core steps to tackle before you even touch a single dish.
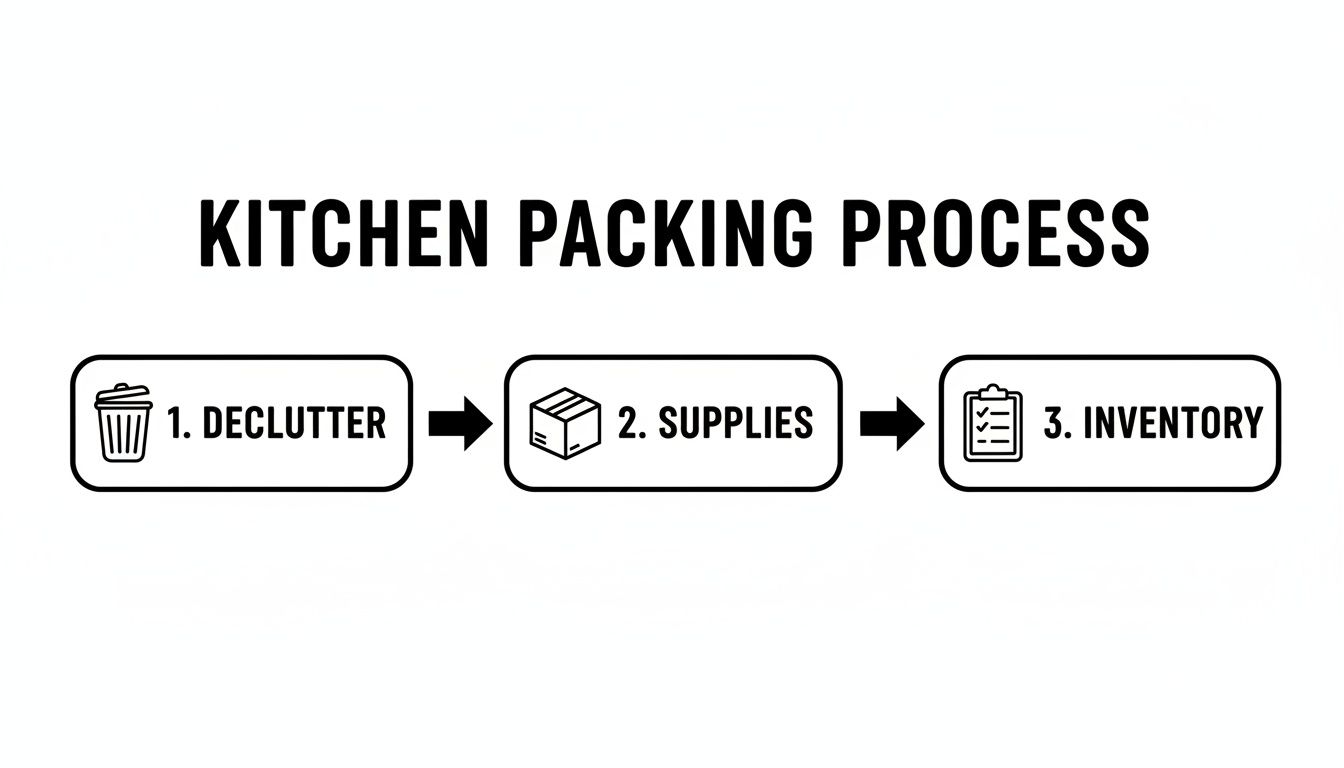
This process—Declutter, Supplies, and Inventory—really is the foundation for a good pack. It makes sure you’re only moving what you need and you have the right tools on hand to do it properly.
Securing Glassware and Stemware
Glassware needs a different strategy. The key is to isolate each piece. You want every glass sitting in its own protected cell, preventing it from clinking against its neighbors. This is where dish pack boxes with cardboard cell dividers are worth their weight in gold.
- Stuff and Wrap: Gently push a half-sheet of crumpled packing paper inside each glass for internal support. Then, wrap the outside with another sheet or two.
- Place in Cells: Lower the wrapped glass into a divider cell, rim-side down. For most glasses, the rim is actually the strongest part.
- Handle Stems with Care: For wine glasses, you’ll want to give the delicate stem some extra padding before wrapping the whole thing. Place these into the cells base-down.
- Layering: In a tall dish pack box, you can create multiple layers. Put the heaviest glassware (like thick tumblers) on the bottom. Add a flat cardboard separator on top, then create a second layer for more delicate items like wine glasses.
Pro-Tip from Family Movers Express: No cell dividers? No problem. After wrapping each glass, use your own clean kitchen towels or even thick socks for extra padding. Just place a towel between each glass to create a soft, cushioned barrier inside a small, sturdy box.
Handling Knives and Sharp Objects Safely
A loosely packed knife is a serious safety hazard for you and for your movers. A blade can easily slice right through a cardboard box and cause a nasty injury when someone goes to lift it. Protecting them is absolutely non-negotiable.
The easiest and safest method is to use the original knife block. Just slide the knives in, then wrap the entire block securely in packing paper or bubble wrap.
If you don't have a block, here’s what you do:
- Create a Cardboard Sheath: Cut a piece of cardboard that’s a bit wider than the blade and twice as long.
- Fold and Secure: Lay the knife on one half of the cardboard and fold the other half over the blade. Tape that cardboard sheath shut so the blade can't possibly slip out.
- Bundle and Pack: Once all your sharp knives are safely sheathed, you can bundle them together with a rubber band and wrap the whole bundle in packing paper. Just make sure to clearly label it "SHARP KNIVES" before putting it in a box with other kitchen tools.
For a deeper dive, our detailed guide on packing dishes for a move has even more specific tips and visuals. Taking the time to get these techniques right ensures your favorite kitchen items arrive at your new Orlando home ready for your first meal, not in a hundred pieces.
Moving Pantry Goods and Appliances in Florida
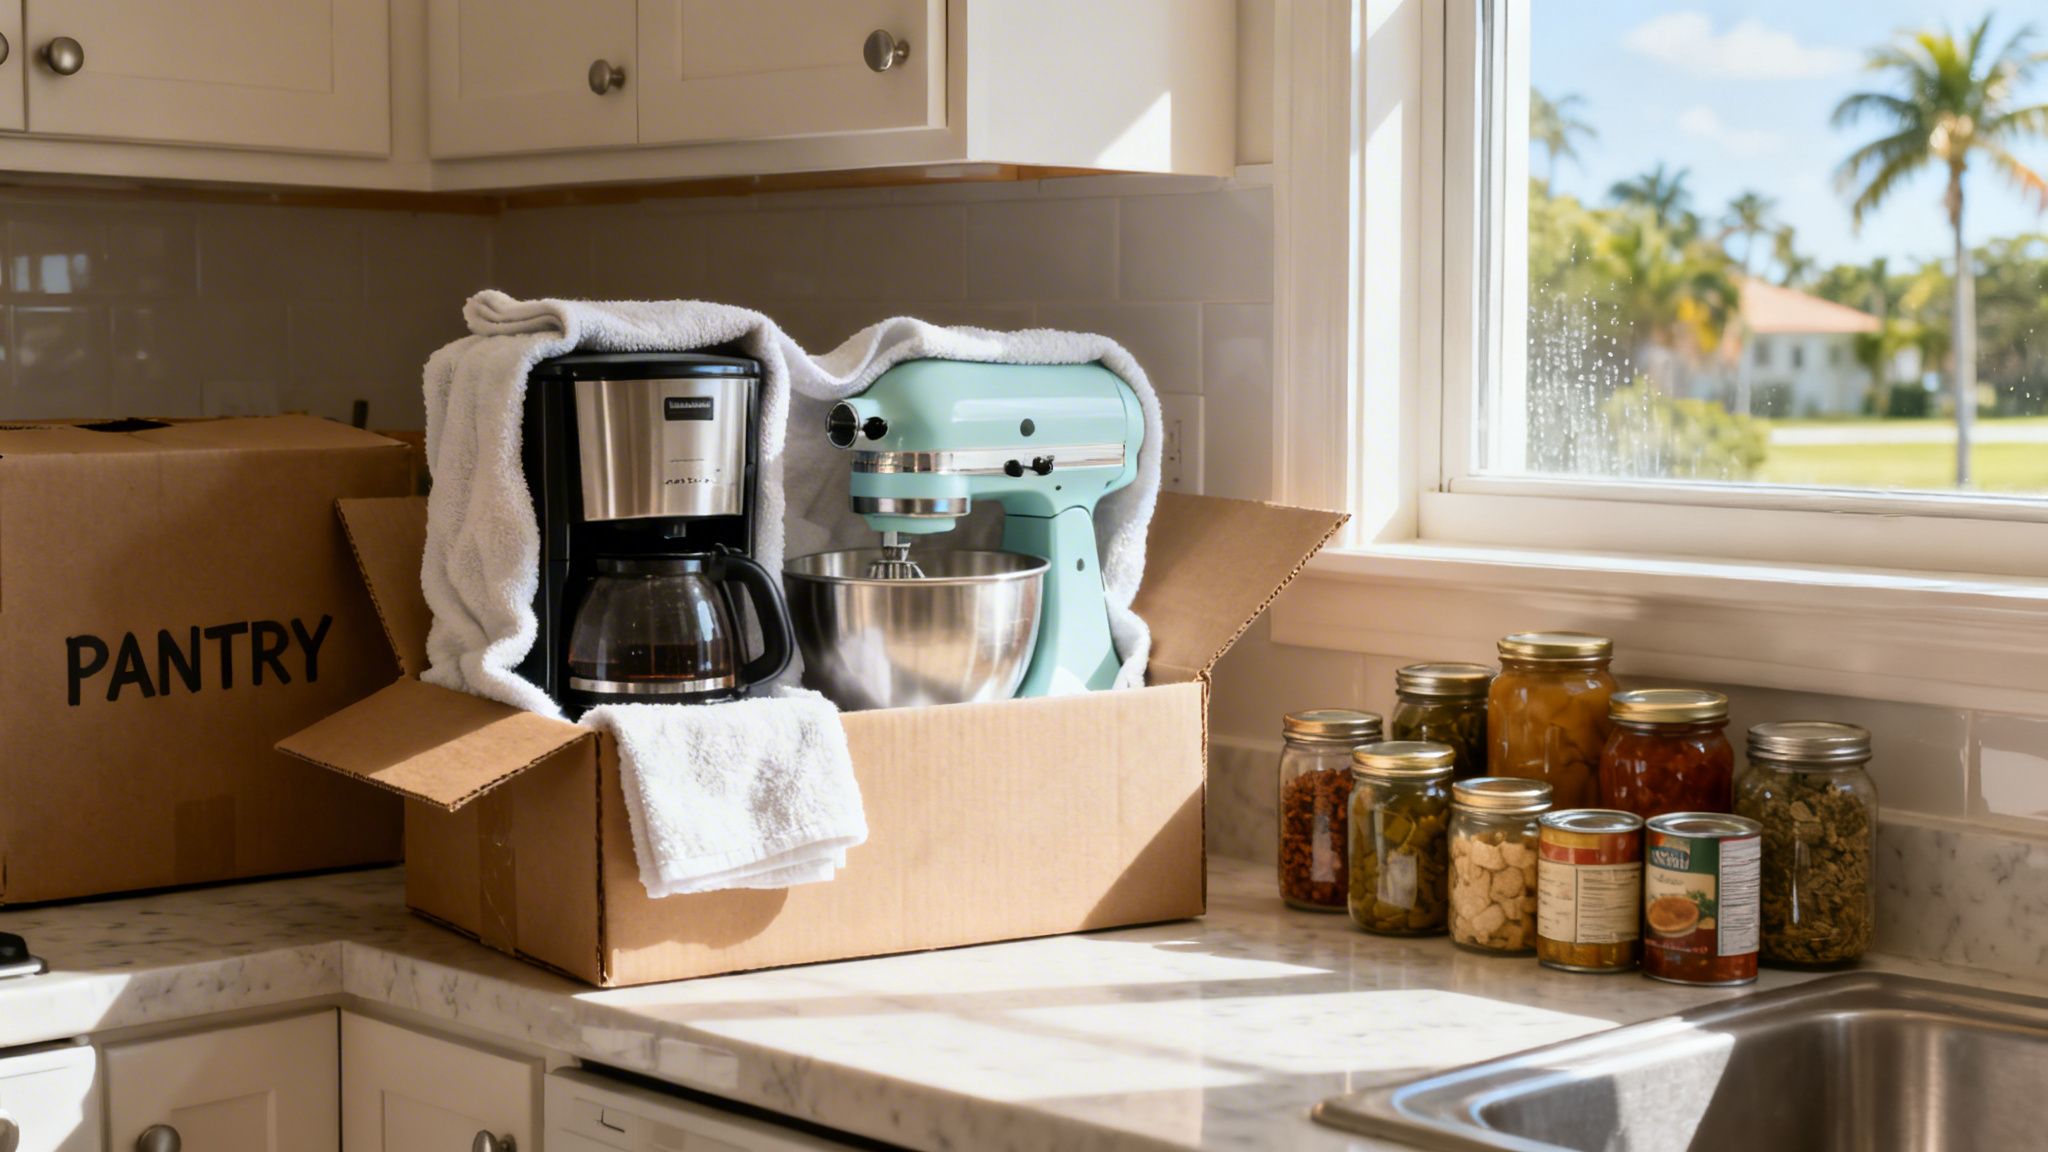
Packing up your pantry and small appliances in Orlando calls for a specific game plan, all thanks to our infamous humidity and heat. This isn't just about wrapping your electronics carefully; it's about preventing food from spoiling and making sure no unwanted pests decide to hitch a ride to your new place in Lake Nona or Winter Park.
Florida's climate is truly unforgiving. A moving truck or storage unit that isn't climate-controlled can turn into an oven in a hurry, especially during the summer. That kind of environment can easily ruin sensitive electronics and turn certain food items into a sticky, bug-attracting nightmare. A little bit of planning is all it takes to avoid costly damage and a frustrating start in your new home.
The Great Pantry Purge
A few weeks before moving day, make your pantry the star of the show. The real goal here is to move as little food as you possibly can. A huge part of this is taking steps to reduce food waste so you're not hauling unnecessary stuff and risking spoilage.
Start by sorting everything into three piles:
- Keep: Stick to unopened, non-perishable goods. Think canned veggies, pasta, and rice. Spices with tight-fitting lids are also good to go.
- Donate: Any unopened, non-perishable foods you know you won't get around to using. Local food banks in Orlando are always grateful for the help.
- Toss: Anything open, expired, or likely to spoil. This means bags of flour, sugar, half-eaten boxes of cereal, and anything in a perishable container.
Trust us, trying to move open food containers is basically sending out a formal invitation to pests. That's a headache no one wants to deal with in a new home. Be ruthless here—it'll save you a ton of trouble later on.
Packing Your Small Appliances for the Florida Climate
Your coffee maker, air fryer, stand mixer, and other countertop gadgets are more sensitive than they look. The humidity we have here in Central Florida can be brutal on their electronic parts, especially if they end up sitting in a hot truck or storage unit for any amount of time.
Here's how our Family Movers Express crews handle them:
- Clean and Dry Thoroughly: This is the single most important step. Any moisture left inside a coffee maker's reservoir or a blender's base is a recipe for mold and mildew in the heat.
- Disassemble and Secure Parts: Take off all the loose bits—the coffee pot, the mixer bowl and its attachments, the air fryer basket. Wrap each of these items on its own in packing paper.
- Bag the Small Bits: Gather all the cords and tiny attachments and put them in a Ziploc bag. Label it and tape it securely to the main appliance so nothing vanishes during the move.
- Use the Original Box (If Possible): Nothing protects an appliance better than the box it came in. If you still have it, now's the time to use it.
- Create a Secure Cushion: No original box? No problem. Grab a small, sturdy moving box and build a thick, 6-inch cushion of crumpled packing paper on the bottom. Set the wrapped appliance inside and then stuff all the empty space around it with more paper. You don't want it to shift an inch.
When your move involves storage, especially during an Orlando summer, the stakes get even higher. The combination of intense heat and humidity can absolutely wreck electronics. It's really worth your time to understand the benefits of what is climate-controlled storage to protect your valuable items.
By taking these extra steps, you’re doing more than just packing. You're actively defending your investments against the unique challenges that come with a Florida move. It's that kind of practical, on-the-ground knowledge that ensures everything arrives safely, ready to be plugged in and put to work in your new kitchen.
Labeling and Staging for an Efficient Unpack
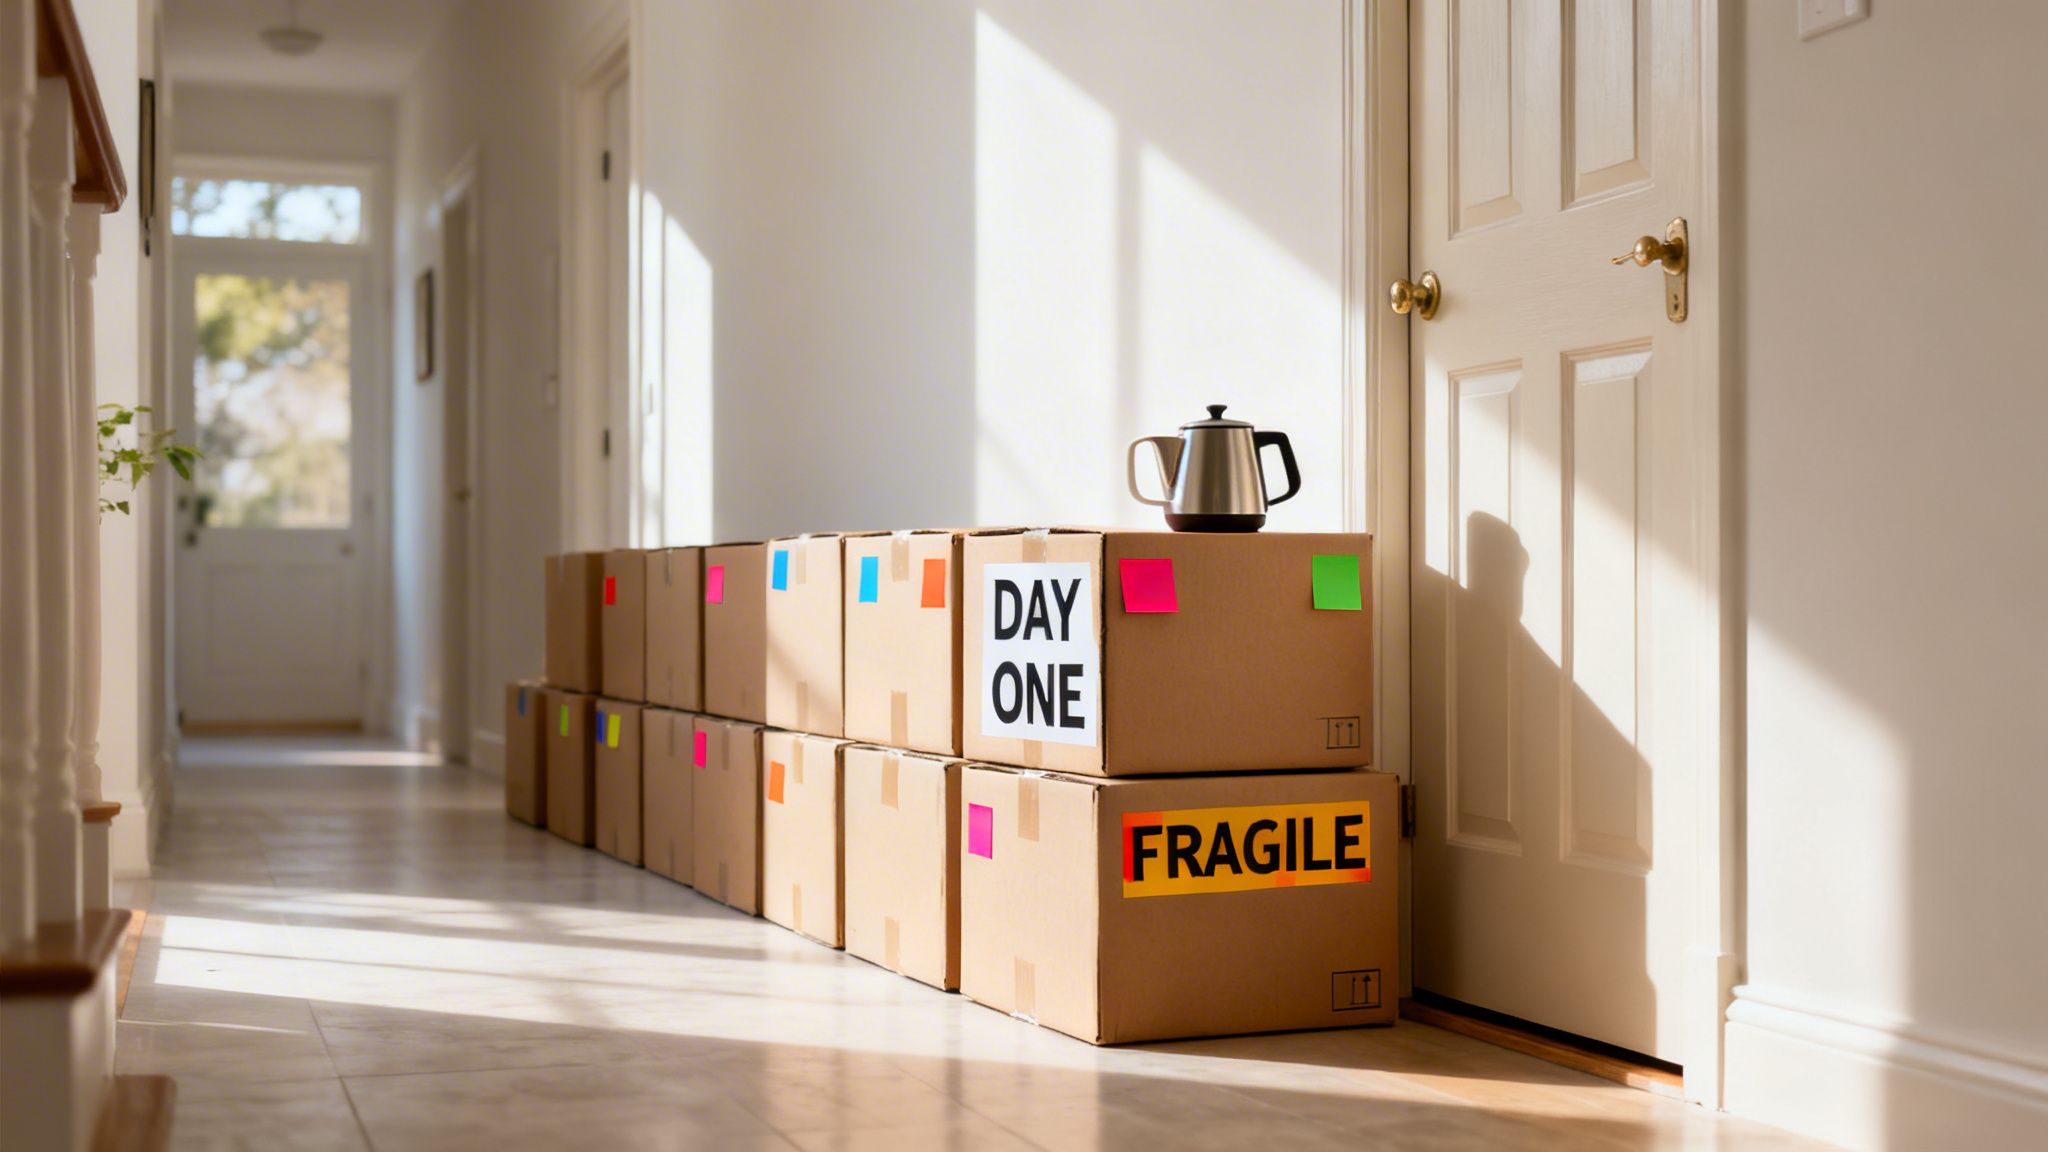
The effort you put in right before the moving truck arrives will pay you back tenfold on the other side. A solid system for labeling and staging your boxes can turn the chaos of unloading into a smooth operation, which is a huge relief after sitting in traffic on I-4.
This goes way beyond just scribbling "Kitchen" on the side of a box with a marker. It's about drawing a clear roadmap for your movers and, more importantly, for your future self who will be too tired to think.
A Professional Labeling System
Vague labels are the enemy of a quick unpack. When you’re exhausted in your new Lake Nona home, the last thing you want to do is start a treasure hunt for the coffee maker. A pro-level system means you know exactly what’s inside every single box and where it’s supposed to go.
Here's the simple but incredibly effective method we use at Family Movers Express:
- Be Specific: Don't just write "Pots & Pans." Get detailed: "KITCHEN – Box 3 of 12 – Pots, Pans, Lids." This level of detail completely eliminates the guesswork later.
- Color-Code Everything: Assign a color to each room. Let's say you pick blue for the kitchen. Every box with kitchen items gets a piece of blue tape or a slash from a blue marker. This is a visual shortcut that helps movers instantly spot where a box belongs.
- Number Your Boxes: Label at least two sides of every box with the room and a unique number (e.g., "KITCHEN – 1/12," "KITCHEN – 2/12"). This makes it easy to do a quick inventory check and make sure nothing got left behind.
Using the right supplies makes this whole process easier. For maximum visibility, consider using large labels for storage bins and moving boxes so your system is impossible to miss.
How to Stage Boxes for the Moving Crew
"Staging" is just a fancy word for getting all your packed boxes organized before the movers show up. A well-staged home lets the crew work faster and safer, which saves you time and cuts down on the risk of damage.
Gather all the kitchen boxes together in one spot. The garage or an area near the front door works well, as long as it's out of the main foot traffic path. Stack the heaviest boxes on the bottom to create stable columns, with the lighter ones on top. And make sure the labels are facing out so the crew can read them at a glance.
Make high-priority boxes obvious. Use a big, bold marker to write "FRAGILE" or "HEAVY" where it can't be missed. This isn't just a friendly suggestion; it's a critical instruction for the moving team.
Your Secret Weapon: The Day One Box
We tell every single one of our Orlando clients this: creating a "Day One" or "Open First" box is the single best thing you can do to keep your sanity on moving day. This one box holds everything you’ll need for the first 24 hours in your new place, stopping you from tearing into box after box just to find a fork.
This box doesn't go on the truck. Keep it with you. Transport it in your own car so it's the first thing you have access to when you walk through the door.
What to Include in Your Orlando "Day One" Kitchen Box
- Coffee Maker & Supplies: For most of us, this is non-negotiable. Pack the coffee, mugs, sugar, and a spoon.
- Basic Utensils: A fork, spoon, and knife for each person for that first pizza night.
- A Few Essentials: One small pot, a good knife, and a small cutting board will get you by.
- Cleaning Basics: Paper towels, a sponge, dish soap, and a trash bag are must-haves.
- Fuel: A few non-perishable snacks and some bottled water will keep your energy levels up.
Honestly, this little box is a game-changer. It brings a slice of normalcy to the unpacking madness and guarantees your first morning in your new home starts with a much-needed cup of coffee, not a frustrating scavenger hunt.
When to Call an Orlando Packing Professional
Look, this guide gives you the full blueprint for tackling your kitchen pack on your own. But let's be realistic—sometimes, calling in the experts is the smartest, safest, and frankly, most efficient choice you can make. It's so easy to underestimate the sheer amount of work involved, and that's a common pitfall we see all the time.
Think about your specific moving scenario for a minute. Are you trying to move out of a downtown Orlando high-rise in Thornton Park, dealing with service elevators and tight schedules? Or maybe your Winter Park home is filled with generations of fragile heirlooms and delicate fine china. These aren't just regular moves; they come with logistical headaches that professionals are trained to handle without breaking a sweat.
Is Professional Packing Right for You?
Choosing to hire packers isn't about throwing in the towel. It's a strategic decision to protect your time, your sanity, and your most valuable possessions. If any of these situations sound familiar, it’s probably time to consider getting some professional help on board:
- You're on a Tight Timeline: Between work, family, and everything else, who has time? Our crews can get an entire kitchen packed up in a matter of hours, not the days it might take you.
- You Own High-Value or Fragile Items: That delicate crystal, your custom dinnerware set, or valuable artwork needs more than just newspaper and hope. We bring the professional-grade materials and proven techniques to make sure they arrive in one piece.
- You're Just Plain Overwhelmed: Moving is already one of the most stressful things you can do. The peace of mind that comes from handing over the most complicated room in the house to experts? That’s priceless.
The real value of hiring professional packers isn't just about saving time—it's about risk mitigation. Our Family Movers Express crews are fully insured. That means your belongings are protected from the moment we wrap the first glass until the very last box is set down in your new home.
Ultimately, it comes down to a simple trade-off: your time, energy, and the value of your items versus the cost of the service. To get a better feel for what's involved, you can explore our overview of professional packers and movers.
When the job just feels too big, let our team of Professional Orlando Movers step in and show you just how smooth this transition can be.
Orlando Kitchen Packing Questions Answered
We get a lot of the same questions from folks moving all over Orlando, whether it's out of a historic home in Winter Park or into a brand-new build down in Lake Nona. Here are some quick, straight-from-the-experts answers to the things we hear most often about packing up a kitchen.
How Many Boxes Am I Going To Need?
This is the big one, isn't it? While every kitchen is different, we've found that a typical kitchen in a one- or two-bedroom Orlando home usually needs somewhere in the neighborhood of 20-30 boxes.
Here’s a rough breakdown of what that usually looks like:
- 8-12 Small Boxes: These are your workhorses. Perfect for heavy stuff like canned goods, those hefty cookbooks you love, and smaller appliances.
- 5-8 Medium Boxes: Use these for the lighter, more awkward items—think plastic food containers, baking sheets, and most of your pots and pans.
- 3-5 Dish Pack Boxes: Don't skip these! These double-walled boxes are a must for giving your glassware and dishes the extra protection they need to survive the move.
Can I Just Use Newspaper Instead of Packing Paper?
It's really tempting to try and save a few bucks here, but we strongly advise against it. Newspaper ink has a nasty habit of transferring right onto your plates and bowls, leaving behind stubborn stains that are a real pain to scrub off when you're trying to unpack.
Just stick with clean packing paper. It’s a small investment that protects your things without creating a whole new chore for you on the other end.
What's the Safest Way to Pack My Knives?
Safety first, always. The absolute best way is to slide the knives back into their wooden block, then wrap the entire block tightly in moving blankets or packing paper.
No block? No problem. Create a makeshift "sheath" for each individual blade by folding a piece of sturdy cardboard over it and taping it shut. Once they're all covered, you can bundle the sheathed knives together with rubber bands, label the bundle clearly, and then pack it in a box with other kitchen utensils.
Moving in Orlando has its own unique quirks, and that's what we specialize in. If you're looking at your kitchen and just feeling overwhelmed, let the Family Movers Express team take that stress right off your plate. Contact our Professional Orlando Movers for a seamless, secure, and expert packing experience.
Ready to protect your upcoming move?
Click Here to Fill Out Our Quick Form & Secure Your Instant Quote!
