
A Pro Guide to Packing Dishes for Moving
The real secret to moving dishes without hearing that dreaded crunch when you unpack isn’t some fancy wrapping technique. It all starts with your supplies.
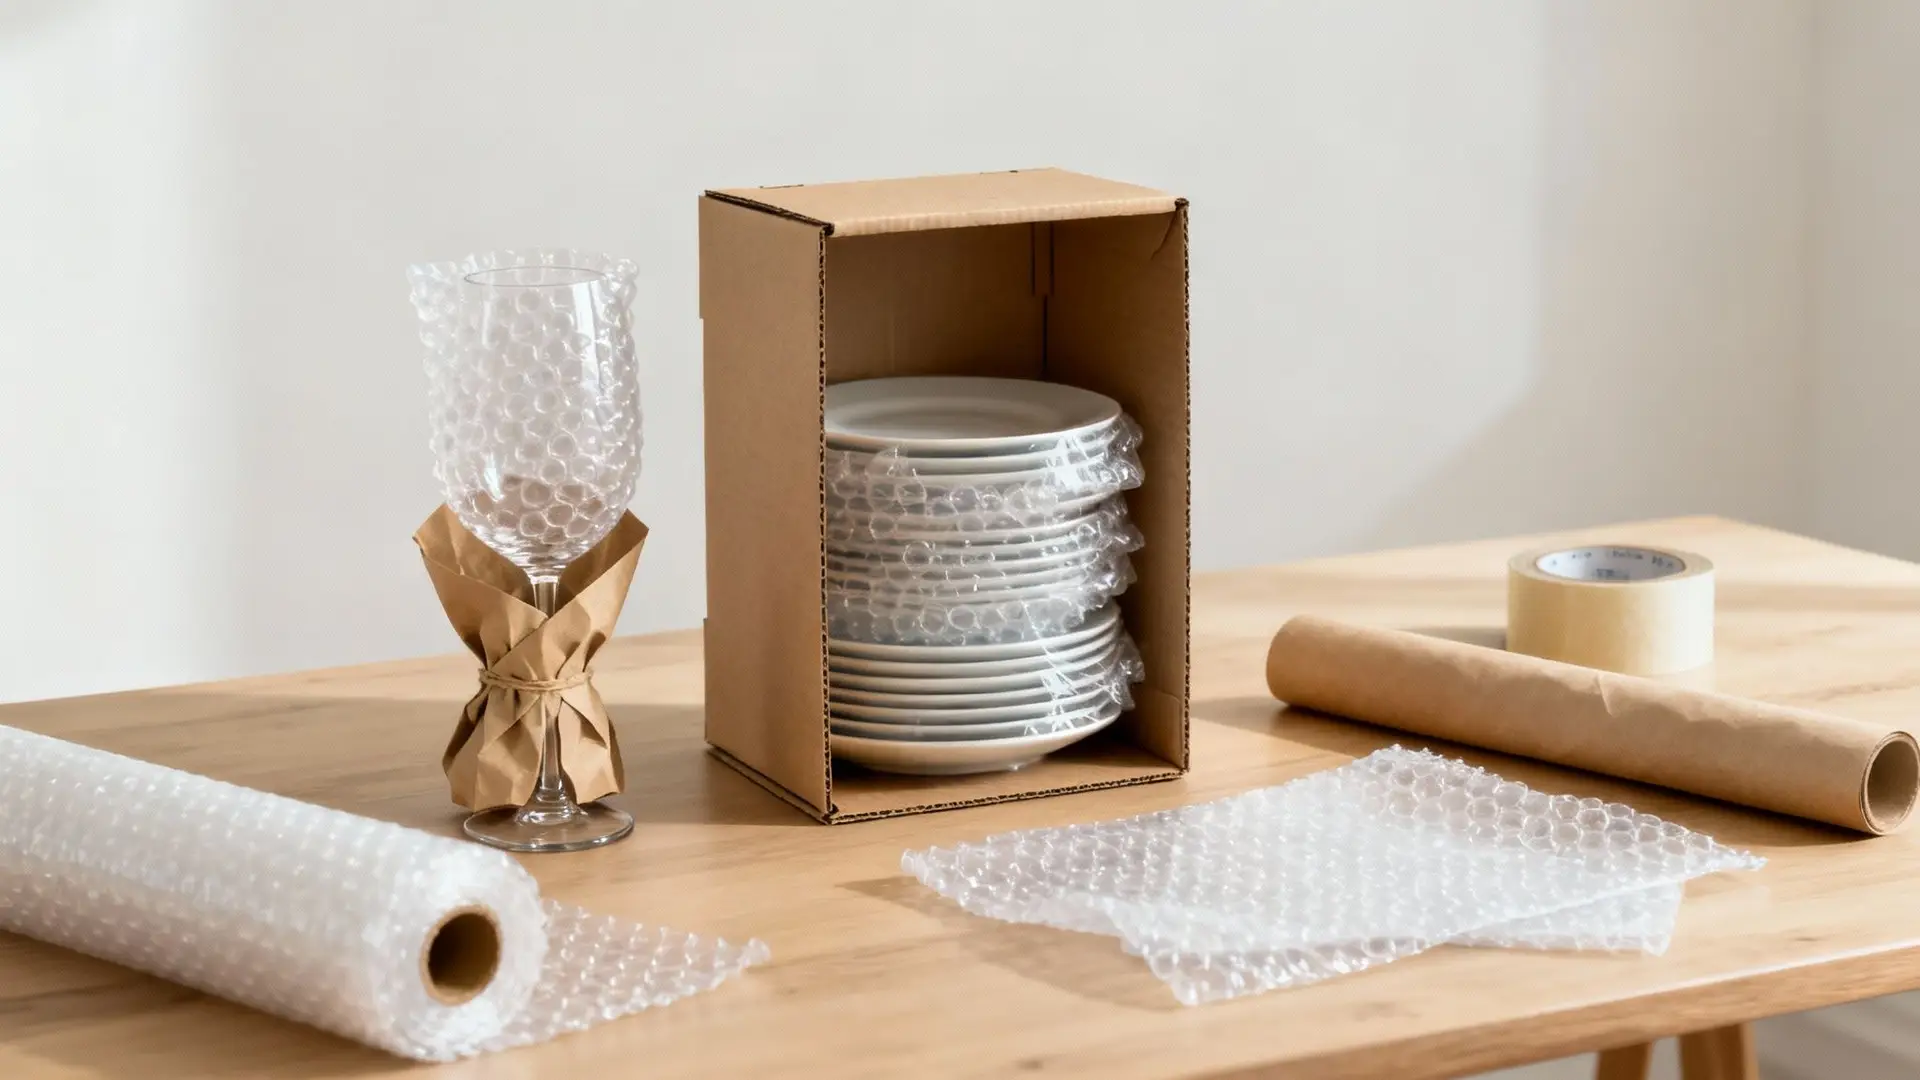
Using the right materials—I’m talking double-walled dish pack boxes, clean packing paper, and tape that actually sticks—is like building a suit of armor for your fragile kitchenware. It’s what stops things from shifting, cracking, and chipping when the truck hits an unexpected pothole.
Choosing Your Packing Supplies Like a Pro
Before a single plate gets wrapped, your first move should be setting up a dedicated packing station with all the right gear. I know it’s tempting to grab used boxes from the grocery store or wrap things in last week’s newspaper, but trust me, those shortcuts almost always end in heartbreak.
Your dishes, whether they’re the everyday set or grandma’s fine china, deserve better. Getting your supplies together first turns a potentially chaotic chore into a smooth, assembly-line process.
Here’s what your setup should look like:
- Sturdy, Double-Walled Boxes: Ask for ‘dish pack’ or ‘dish barrel’ boxes specifically. That double-layer construction is non-negotiable for providing the rigidity you need.
- Clean Packing Paper: Never, ever use newspaper. The ink will transfer onto your dishes, leaving a greasy, stubborn film that’s a nightmare to scrub off.
- Bubble Wrap: This is your best friend for anything extra delicate, like the stems on wine glasses or the handles on a porcelain serving dish.
- High-Quality Packing Tape: Don’t go cheap on tape. A strong, wide roll is what keeps your carefully packed boxes from falling apart at the seams.
- Markers: You’ll want bold, clear labels that nobody can miss.
The Right Box for the Job
Let’s be clear: not all cardboard is created equal. A standard, single-wall box might be fine for your throw pillows, but it’s a disaster waiting to happen for a heavy stack of plates. The weight alone can cause a flimsy box to buckle or burst open.
Dish pack boxes are what the pros use, and for good reason. They are specifically engineered to handle the vibrations and bumps of a moving truck. Their thicker walls prevent them from getting crushed when other boxes are inevitably stacked on top. They’re also the perfect size and shape for packing plates vertically—a game-changing technique we’ll get into that drastically cuts down the risk of breakage.
Essential Packing Supplies Comparison
Choosing between what’s cheap and what’s effective can be tough. Often, what you save in dollars on standard supplies, you risk in damage to your valuables. Here’s a quick breakdown to help you understand why professional-grade materials are worth the small investment.
| Supply Item | Standard Option (and its risks) | Professional-Grade Recommended (and why) | Best For |
|---|---|---|---|
| Boxes | Single-wall grocery boxes (Prone to crushing, moisture damage, and bursting under weight.) | Double-walled Dish Pack/Dish Barrel (Superior strength, prevents crushing, designed for vertical packing.) | Plates, bowls, glasses, heavy kitchen items. |
| Cushioning | Newspaper (Ink transfers easily, offers minimal shock absorption.) | Clean Packing Paper (Provides a clean, protective layer and excellent void fill without staining.) | Wrapping individual items, creating cushion layers. |
| Extra Protection | Towels/Linens (Can shift, offer inconsistent padding, and leave items exposed.) | Bubble Wrap (Offers targeted, superior shock absorption for the most fragile pieces.) | Wine glass stems, delicate handles, crystal, heirlooms. |
| Sealing | Masking or cheap tape (Loses adhesion, can’t support heavy loads, peels off easily.) | High-Quality Packing Tape (Strong adhesion, maintains structural integrity of the box.) | Assembling and sealing all moving boxes. |
Ultimately, using the right tools for the job isn’t just about preventing breakage; it’s about peace of mind. Knowing your cherished items are secure makes the whole moving process less stressful.
Paper, Bubble Wrap, and Tape Explained
Clean packing paper is the true workhorse of any packing job. It serves two critical functions: first, it creates a soft, protective cushion around each individual item. Second, when crumpled up, it fills the empty spaces in your box.
This is a key part of learning how to pack for a move like a professional. You want the inside of your box to be a solid, unmoving block. No shifting, no rattling.
While paper handles most things, bubble wrap is for your VIPs (Very Important Pieces). Think of it as an extra layer of insurance for items like:
- Thin-stemmed wine glasses
- Antique teacups with fragile handles
- Crystal serving bowls
- Anything irreplaceable
Industry data from U.S. movers shows that packing materials account for roughly 18-22% of professional packing costs. That number alone tells you how vital these supplies are. In fact, bubble wrap is used in nearly 90% of professional dish packing jobs, and heavy-duty corrugated dish barrels are the standard in 65% of moves to protect plates.
Finally, a good roll of packing tape is your best friend. To assemble your boxes properly, tape along the center seam and then across both side seams. This creates a strong ‘H’ pattern. Do the same thing when you seal the top.
Pro Tip: Do your back a favor and set up your packing station on a sturdy table or countertop. Hunching over boxes on the floor is a recipe for aches and pains. A comfortable, waist-high workspace will make the entire job go faster and feel a lot less like a chore.
The Best Way to Wrap and Cushion Your Dishes
With your supplies gathered, it’s time to get into the real art of packing dishes. This isn’t just about covering things up; it’s about creating a shock-absorbing capsule inside every single box. It’s a technique professional movers have perfected, and it’s what separates a box of intact dishes from a box of sharp, disappointing shards.
The main goal here is simple: eliminate all internal movement. If a dish can’t shift, rattle, or bump into its neighbor, its odds of surviving the trip go way up. Every jolt from a pothole gets absorbed by your cushioning, not your grandma’s china.
This infographic breaks down the fundamental workflow for every box you pack.
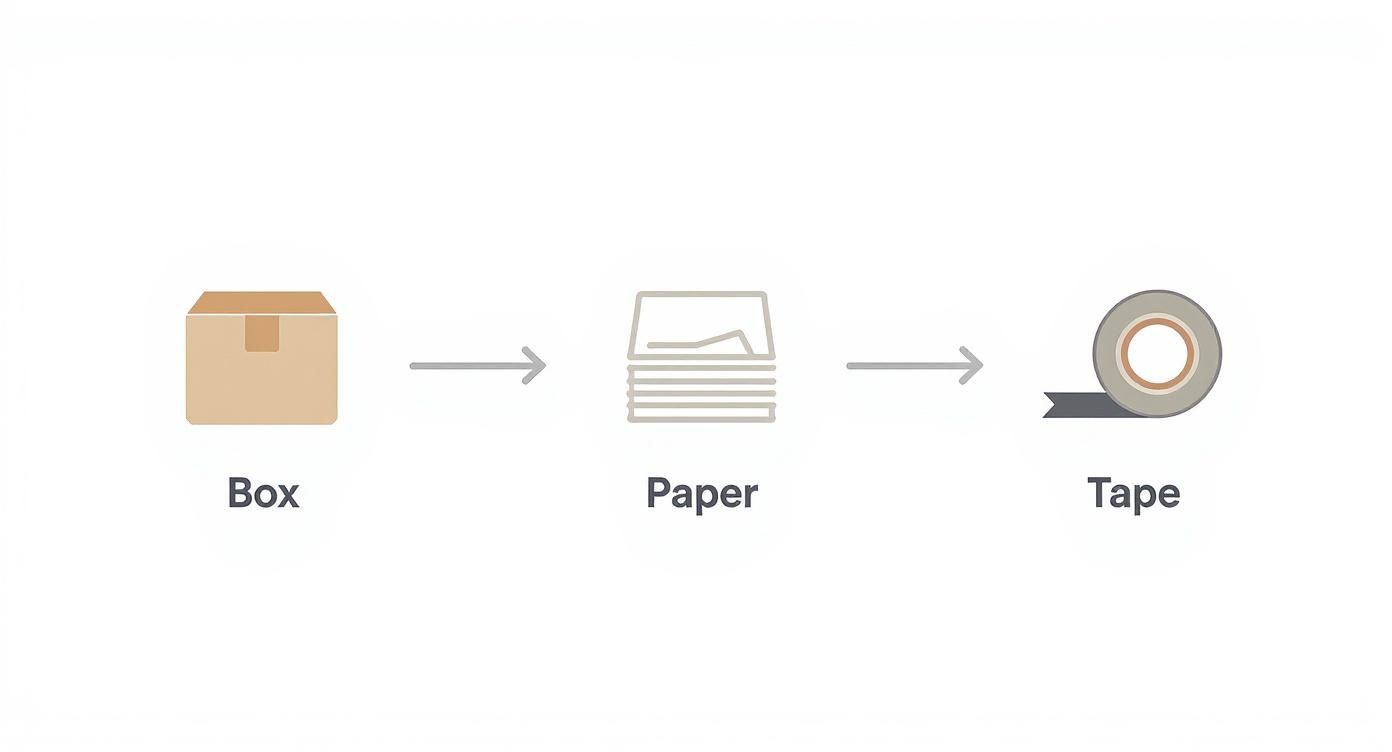
This process—a sturdy box, plenty of paper, and a secure seal—is the foundation for protecting everything in your kitchen.
Mastering the Art of Cushioning
Before a single plate goes into the box, you have to build a protective nest. This is a non-negotiable step that, in my experience, people often skip when they’re in a rush. Don’t be one of them.
Grab several sheets of packing paper, crumple them up loosely, and create a thick, springy cushion at the bottom of your dish pack. You’re aiming for a layer that’s at least four to six inches deep. Think of it as the box’s personal suspension system, there to absorb the first shock of any bump or drop.
Crumpled paper is surprisingly effective because the air pockets dissipate force. It’s a simple trick, but it’s one of the most critical for getting your items to their destination in one piece.
A common mistake is just laying a few flat sheets of paper on the bottom. Flat paper offers almost zero protection. The real magic of packing paper is unlocked only when you crumple it.
The Professional Bundling Technique for Plates
For flat items like plates and saucers, we use a method called “bundling.” It might sound odd to group fragile items together, but when you do it right, you create a tight, unified package that’s much stronger than a bunch of individually wrapped plates floating around.
Here’s the step-by-step:
- Lay a sheet of packing paper on your work surface. Place one plate right in the center.
- Fold one corner of the paper completely over the plate.
- Set a second, same-sized plate directly on top of the first.
- Fold the remaining sides of the paper snugly over the stack.
- Now, place this pair onto a new sheet of packing paper and wrap the entire bundle all over again.
For heavy dinner plates, I recommend sticking to bundles of two. For smaller, lighter items like salad plates or saucers, you can probably get away with bundles of three or four. This technique gives each plate a cushion while the outer wrap holds the whole bundle together securely.
Protecting Bowls, Glasses, and Mugs
Hollow items like bowls and glasses need a two-part approach: you have to protect them from the inside out. An empty glass is incredibly vulnerable to being crushed because its structure is unsupported.
Start by crumpling a half-sheet of packing paper and gently stuffing it inside the item. This internal support keeps the walls from flexing and cracking under pressure. You don’t want to pack it so tight you break it, but it should feel firm.
Once the inside is stuffed, wrap the outside. Place the glass or mug on its side on a sheet of paper, roll it up, and tuck in the ends as you go. For an in-depth look at protecting mugs, check out our comprehensive guide on the best ways of packing mugs for a move.
Special Care for Wine Glasses and Stemware
If there’s one common casualty in a DIY move, it’s the stem of a wine glass. That’s its weakest point, and it needs some special attention.
First, focus on the stem. Gently wind a piece of packing paper around the stem itself until it feels well-cushioned. Next, stuff the bowl of the glass with crumpled paper, just like you would with a regular glass.
Finally, lay the glass on its side on a full sheet of packing paper and roll it up, making sure that cushioned stem is fully protected. Always pack stemware right-side up in the box—never upside down. Putting them in upside down puts all the pressure on the delicate rim. For these extra-fragile pieces, bubble wrap is your best friend; wrap them in paper first, then add a layer of bubble wrap for maximum security.
How To Pack Boxes For Maximum Protection
Once you’ve got everything individually wrapped and padded, it’s time for the final showdown: getting it all safely into a box. Just tossing things in won’t cut it. The real secret to preventing a box full of shards is in how you arrange everything. Think of it like a high-stakes game of Tetris where every piece has to support the others, creating a solid, unshakeable unit.
Properly loading a box turns it from a simple container into a fortress for your kitchenware. The techniques we pros use are all about physics—distributing weight and pressure so nothing cracks under the strain of being on the road. Let’s walk through the methods that make all the difference.
The Golden Rule: Pack Plates Vertically
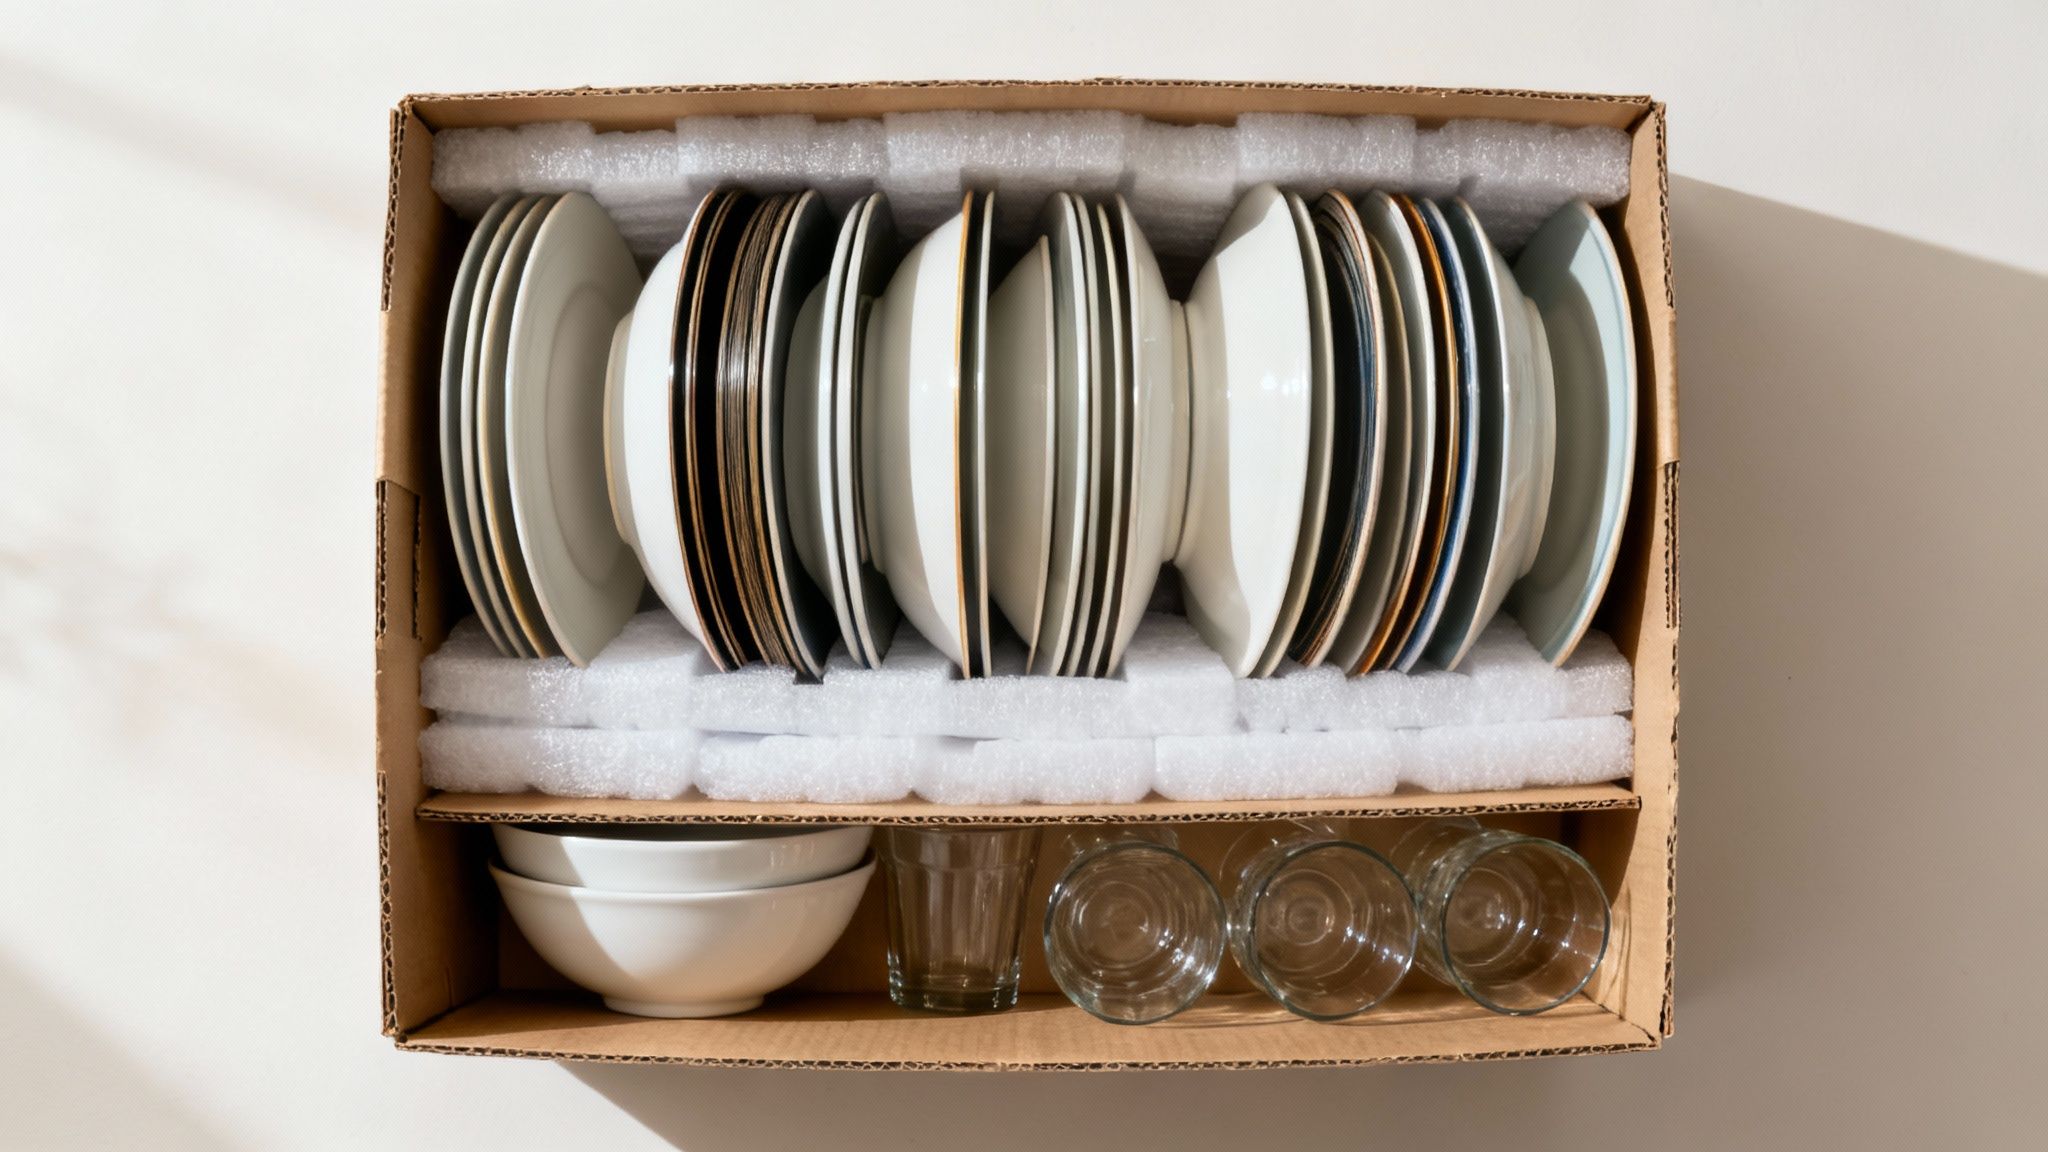
If you only take one piece of advice from this entire guide, make it this one: always pack plates and platters on their edges, standing up. Never, ever stack them flat like you do in your kitchen cabinet. I can’t tell you how many times I’ve seen this mistake—it’s the single biggest cause of broken plates during a move.
When you stack plates flat, every little bump and vibration from the truck transfers directly up the stack. That puts a crazy amount of pressure on the plates at the bottom, making them incredibly vulnerable. But when they’re standing on edge, they are structurally much, much stronger and can handle the ride.
It’s the same principle as books on a bookshelf or records in a crate. You’re using their natural strength to your advantage.
- First, lay down a thick, six-inch cushion of crumpled packing paper at the bottom of the box. Don’t skimp here.
- Place your wrapped bundles of plates into the box on their narrow edges.
- Pack them in snugly side-by-side. You don’t want them to have any room to lean or fall over.
- Stuff any and all gaps between the plates and the box walls with more crumpled paper until nothing can move.
Layering Bowls And Glasses For Stability
While plates need to stand tall, bowls and glasses have a completely different strategy. For these, you’ll want to pack in layers, building a stable, cushioned base. The main principle is simple: heaviest items at the bottom, lightest at the top.
Start with your heavy hitters, like big mixing bowls or sturdy soup bowls, on the very first layer. After wrapping each one, place it rim-down in the box. Create a nice, flat layer, and then fill in any gaps around them with crumpled paper.
Before you start the next layer, you need to create a new cushion. Put a few flat sheets of packing paper over the first layer of bowls, then add a layer of crumpled paper on top of that. This acts as a shock-absorbing divider. Your next layer might be smaller dessert bowls, and you’ll finish with your most delicate glasses at the very top.
Crucial Takeaway: No matter what you’re packing, every box should feel like a solid brick. If you can hear or feel anything shifting when you gently shake the sealed box, you’ve got to open it back up and add more cushioning. A silent box is a well-packed box.
The Dangers Of An Overpacked Box
It’s tempting to cram as much as possible into one box to save a trip, but trust me, this is a huge mistake. An overstuffed box is a recipe for disaster. It’s not just dangerously heavy—its structural integrity is shot.
Most professional movers will tell you that a box of dishes should never weigh more than 40 pounds. Anything heavier than that is just asking to be dropped. Plus, the extra weight puts a ton of strain on the cardboard and tape, making a bottom blowout way more likely.
Instead of one back-breakingly heavy box, it’s always smarter to use two lighter, more manageable ones. It saves your back and, more importantly, your fragile stuff. These principles of handling fragile items are just as critical in a commercial setting, which you can read more about in our guide on how to prepare fragile items during an office move.
The risks of bad packing get even bigger on long-distance or international moves. In fact, data for international moves shows that 60% of claims are for fragile goods, usually because of poor padding or the wrong kind of boxes. To avoid this, specialized supplies like double-walled boxes and custom dish barrels are used in 85% of international moves. This is how pros mitigate the risk when fragile items are going a long way.
A Smart System for Labeling Your Boxes
After you’ve so carefully wrapped and packed every last dish, this final step—labeling—is what makes or breaks your unpacking experience. Trust me, a poorly marked box is a mystery you don’t want to solve when you’re already exhausted from the move. But a smart labeling system? That’s your roadmap to finding exactly what you need, right when you need it.
Think of it this way: your future self will thank you for taking an extra 30 seconds to label a box properly. It’s a simple act that transforms a chaotic pile of cardboard into an organized, easy-to-navigate inventory of your life.
Beyond Just “Kitchen”
Simply scribbling “Kitchen” on a box just doesn’t cut it. Your kitchen could easily fill ten or more boxes, and the last thing you want is to tear open five of them just to find a single coffee mug for that much-needed first-morning brew. The key is to be specific and, just as importantly, consistent.
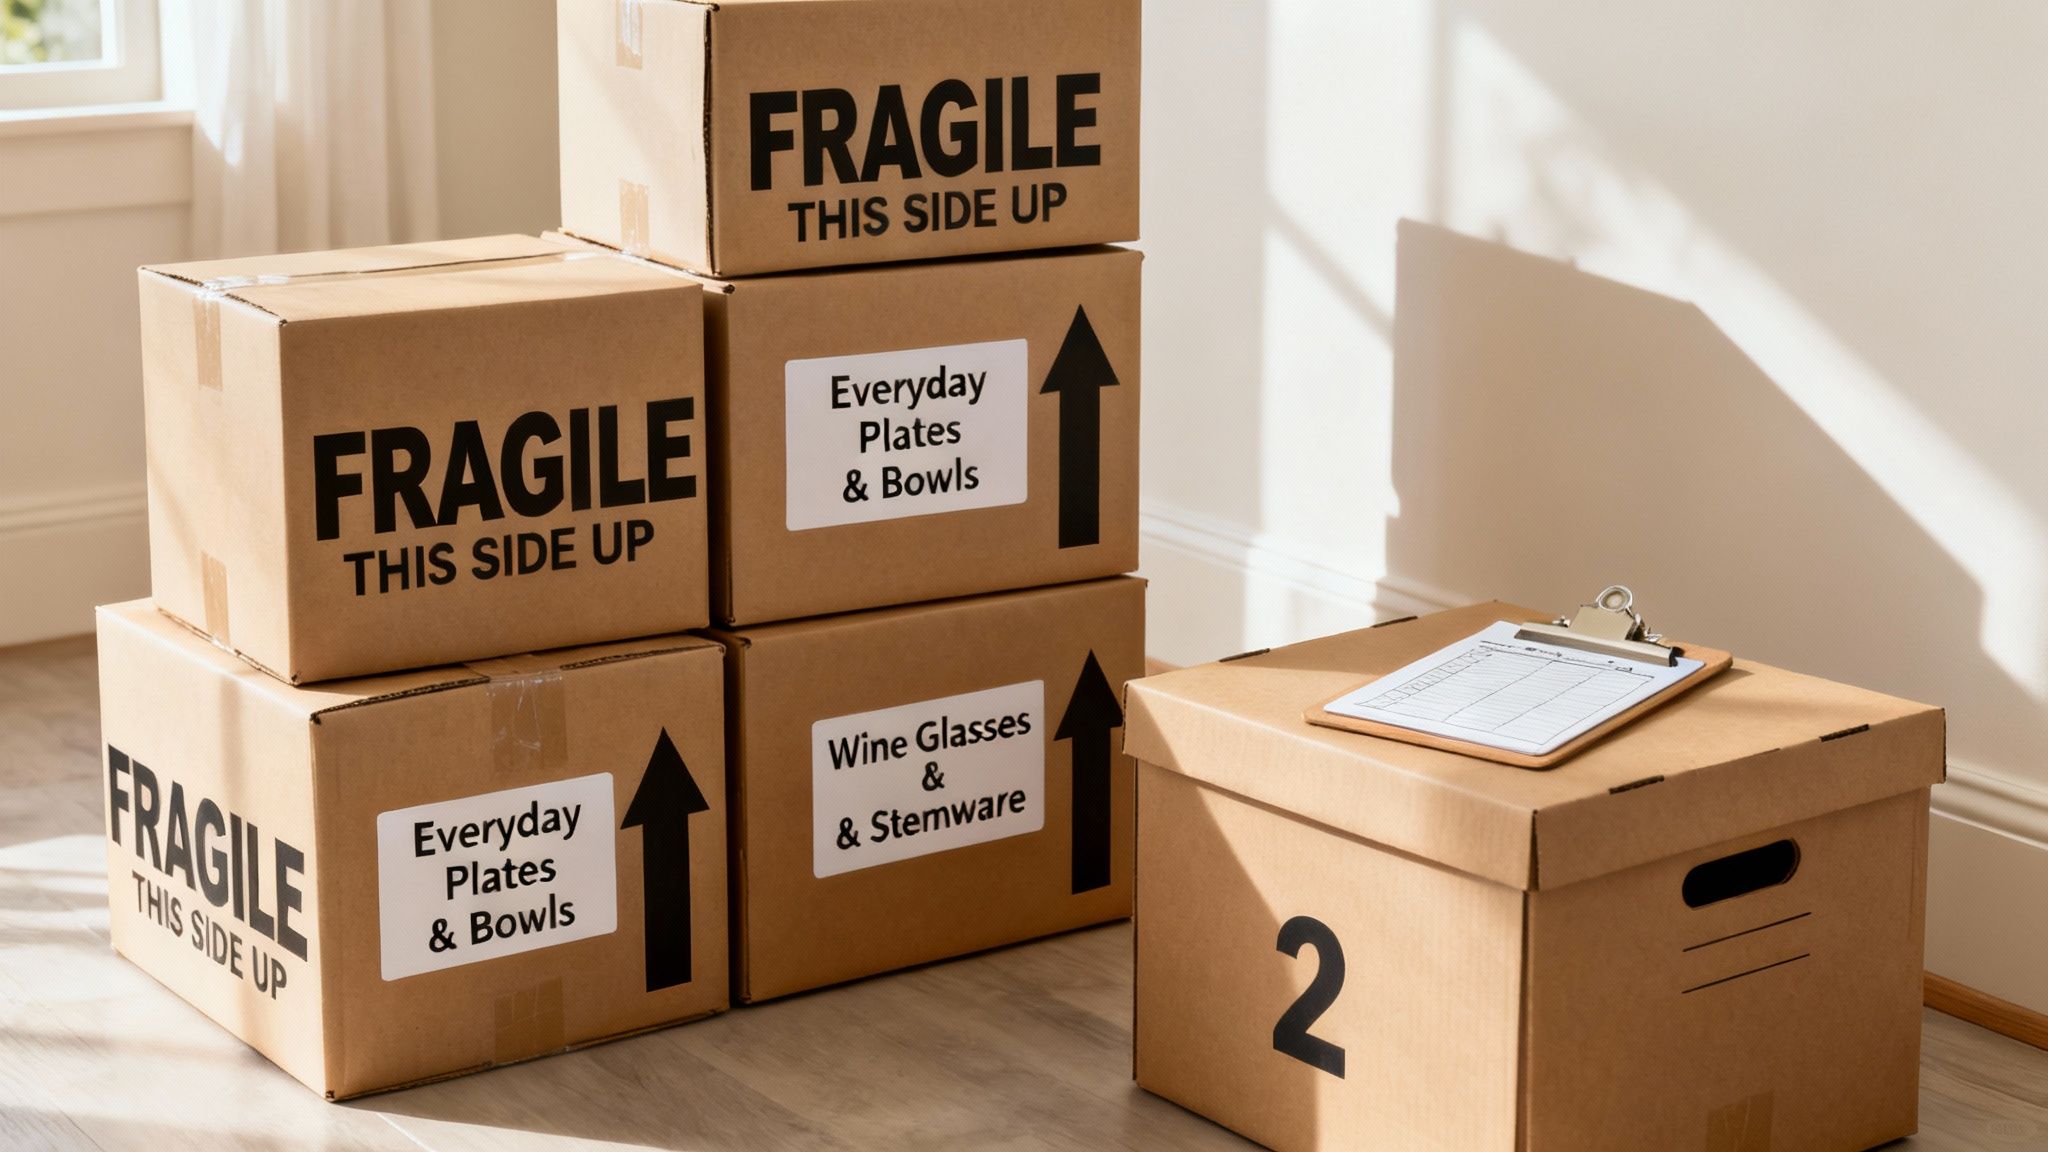
Grab a thick, dark permanent marker so your writing is easy to spot from a distance. On at least two sides of every box packed with dishes, you need to clearly write three key things:
- FRAGILE: This needs to be big, bold, and in all caps. It’s the universal signal for “handle with extreme care.”
- THIS SIDE UP: Don’t just write the words; draw arrows pointing upward to leave zero room for error. This ensures your carefully stacked plates stay vertical and safe.
- Specific Contents: This is where the magic happens. Instead of a generic room name, get detailed. Write “Everyday Plates & Bowls” or “Wine Glasses & Stemware.”
This level of detail is a cornerstone of professional moving strategies, including the ones we outline in our guide on essential checklists and tips for moving out of state. The more info you put on the outside of the box, the less guesswork you’ll have to do later.
Create a Simple Box Inventory
Want to take your organization to the next level? Create a simple inventory system. It sounds like a lot of work, but it’s easier than you think and provides invaluable peace of mind, especially if a box gets misplaced during the move.
As you tape each box shut, assign it a number. Write that number clearly on all sides. Then, in a notebook or a quick spreadsheet on your phone, log the number and a brief description of what’s inside.
Example Inventory Log:
- Box #12: Everyday Dinner Plates & Salad Plates
- Box #13: Soup Bowls & Cereal Bowls
- Box #14: Coffee Mugs & Glassware
This inventory is an absolute lifesaver. When you’re desperate for a specific soup bowl on that first night in your new place, you can just glance at your list and grab the right box instantly. It also doubles as a crucial record for insurance purposes if anything gets damaged or goes missing. A few extra minutes spent on this step can genuinely save you hours of frustration down the road.
Deciding When to Hire Professional Packers
Taking on the task of packing your own dishes might seem like a smart way to trim your moving budget, but it’s a job that requires a serious amount of time, patience, and attention to detail. Before you dive headfirst into a sea of packing paper and bubble wrap, it’s worth thinking about the times when calling in the experts isn’t a luxury—it’s a game-changing strategic move.
The biggest reason people call us? A tight deadline. If you’re staring down a short-notice job relocation or have a single weekend to pack up your entire life, the hours it takes to carefully wrap every plate, glass, and bowl can feel impossible. What might take you a full week of evenings becomes a single afternoon for a professional crew that does this every single day.
When Expertise Is Non-Negotiable
Beyond the clock, the nature of what you’re packing is a huge factor. If your kitchen is full of items that are not just breakable but also carry deep sentimental or financial value, professional packing adds a crucial layer of security and peace of mind.
Think about these common scenarios:
- Priceless Heirlooms: That set of fine china your grandmother gave you needs more than just paper and a sturdy box. It needs an expert’s touch.
- Delicate Crystal: We’ve all seen it—thin-stemmed wine glasses and delicate crystal bowls are incredibly easy to snap. Pros use industry-grade materials and techniques to prevent that.
- Large, Awkward Items: Those heavy serving platters or massive, oddly-shaped ceramic bowls are notoriously difficult to secure properly if you don’t have the experience.
Honestly, in these situations, the confidence that comes from knowing your most cherished items are in safe hands is priceless. You can check out the full advantages of hiring professional movers in our guide, where we cover everything from efficiency to insurance.
The Cost Versus Value Calculation
At the end of the day, hiring professional packers is an investment in a smoother, safer move. It might surprise you to learn that up to 30% of damage claims on residential moves come from improperly packed fragile items, especially dishes.
To have a professional crew pack up your kitchen, you’re typically looking at a cost between $150 to $400 in most major U.S. markets. That’s usually just 5-10% of a standard local move’s total cost—a pretty small price when you compare it to the heartbreak and expense of replacing a treasured dinnerware set.
Key Takeaway: The decision to hire packers boils down to a simple trade-off. You’re swapping a manageable, upfront cost for a huge savings in your own time, physical effort, and mental stress, all while slashing the risk of costly breakage. For a lot of people, that’s a trade worth making every single time.
Your Top Dish-Packing Questions, Answered
Even with a solid game plan, questions always come up when you’re standing in a kitchen surrounded by stacks of plates and rolls of paper. As movers, we hear the same concerns all the time. Let’s clear up some of the most common dilemmas so you can pack up your kitchen with total confidence.
Can I Just Use Towels or Clothes to Pack My Dishes?
It’s a tempting thought, isn’t it? Kill two birds with one stone, save a little money on paper. We see why people consider it, but as professional movers, we strongly advise against using towels, clothes, or any other linens as the main packing material for your dishes. It’s a shortcut that often ends in heartbreak.
Here’s the thing: fabric just doesn’t provide the right kind of support. Unlike crumpled packing paper, which creates a firm, shock-absorbing cushion, towels and clothes compress under weight. Once that happens, your carefully packed items can shift, slide, and slam against each other with every bump in the road. A box packed correctly with paper is a dense, stable unit. A box packed with linens is an accident waiting to happen.
There’s also a big safety issue. If a dish does break, sharp pieces of ceramic or glass can get buried deep in the fabric. You could easily cut yourself badly when you’re unpacking later. It’s much safer to stick with packing paper for wrapping. Use your towels and blankets to fill any large, empty voids at the very top of a box that’s already been packed and secured.
What’s the Single Biggest Mistake People Make With Plates?
If there’s one thing we wish we could tell everyone, it’s this: do not pack your plates flat. We see this all the time. People stack them horizontally, one on top of the other, exactly like they sit in the cupboard. It feels intuitive, but it’s the absolute worst way to pack them for a move.
Think about it. When packed flat, every single jolt and vibration from the truck travels directly up that stack. This puts an incredible amount of focused pressure on the plates at the bottom, making them extremely vulnerable to cracks and fractures. They simply weren’t designed to take that kind of repeated impact.
The right way—the much, much safer way—is to always stand plates on their edges, vertically, like records in a crate. A plate’s structure is exponentially stronger in this position, allowing it to dissipate the bumps and pressures of transit far more effectively.
Just make sure you pack them in there snugly, side-by-side, so they can’t lean or slide. Then, stuff all the gaps around them with crumpled paper to lock everything into that secure, upright position.
How Many Plates Can I Safely Put in One Box?
This is all about striking the right balance between getting the job done efficiently and keeping things safe. The golden rule is to keep every box at a manageable weight, which for us means under 40 pounds. A box that’s too heavy is not only a pain to lift, but it’s also far more likely to be dropped or have the bottom tape give way.
For a standard small moving box (the kind often called a “book box”), a good rule of thumb is somewhere between 8 and 12 dinner plates. Of course, this depends on what they’re made of. Heavy stoneware is going to hit that weight limit a lot faster than lightweight Corelle will.
Here’s a great pro technique: after wrapping each plate individually, create small “bundles” of three or four plates of the same size by wrapping them all together in another sheet of paper. Stand these bundles vertically in the box. Trust us, it’s always better to use a few more lighter boxes than to create one or two dangerously heavy ones.
Do I Really Need to Use Bubble Wrap for Everything?
Nope, you definitely don’t. Using bubble wrap on every single dish would be overkill, not to mention expensive and time-consuming. For your durable, everyday plates, bowls, and coffee mugs, a few layers of clean packing paper will do the job just fine.
Save the bubble wrap for the items that truly need that extra level of protection. Think of it as premium insurance for your most fragile and valuable pieces. We always recommend it for things like:
- Thin-stemmed wine glasses and delicate crystal flutes.
- Antique china, especially pieces with fragile handles or decorative elements.
- Fine porcelain serving platters, teapots, and teacups.
- Anything that’s either priceless to you or would be impossible to replace.
A smart strategy is to use packing paper for the vast majority of your kitchenware and reserve the bubble wrap for that small, high-risk group. For maximum effect, wrap the item in paper first to create a soft inner layer, then add a layer of bubble wrap for that ultimate shock absorption.
Navigating all the details of a move can feel like a full-time job. You don’t have to tackle it alone. If you’re hoping for a stress-free experience with a team that treats your home and belongings with care, Family Movers Express LLC is here to help. See how our professional packing and moving services can make your next move the easiest one yet by visiting https://www.familymoversxpress.com.
Ready to protect your upcoming move?
Click Here to Fill Out Our Quick Form & Secure Your Instant Quote!
