

When it comes to packing up your fragile items, there’s a simple, proven formula I’ve seen work time and time again: use the right materials, wrap every single item individually, and then fill every last bit of empty space in the box. This core strategy is what prevents things from shifting and absorbs the inevitable shocks of transit, making sure everything from your wine glasses to your flat-screen TV arrives in one piece.
Your Blueprint for a Damage-Free Move
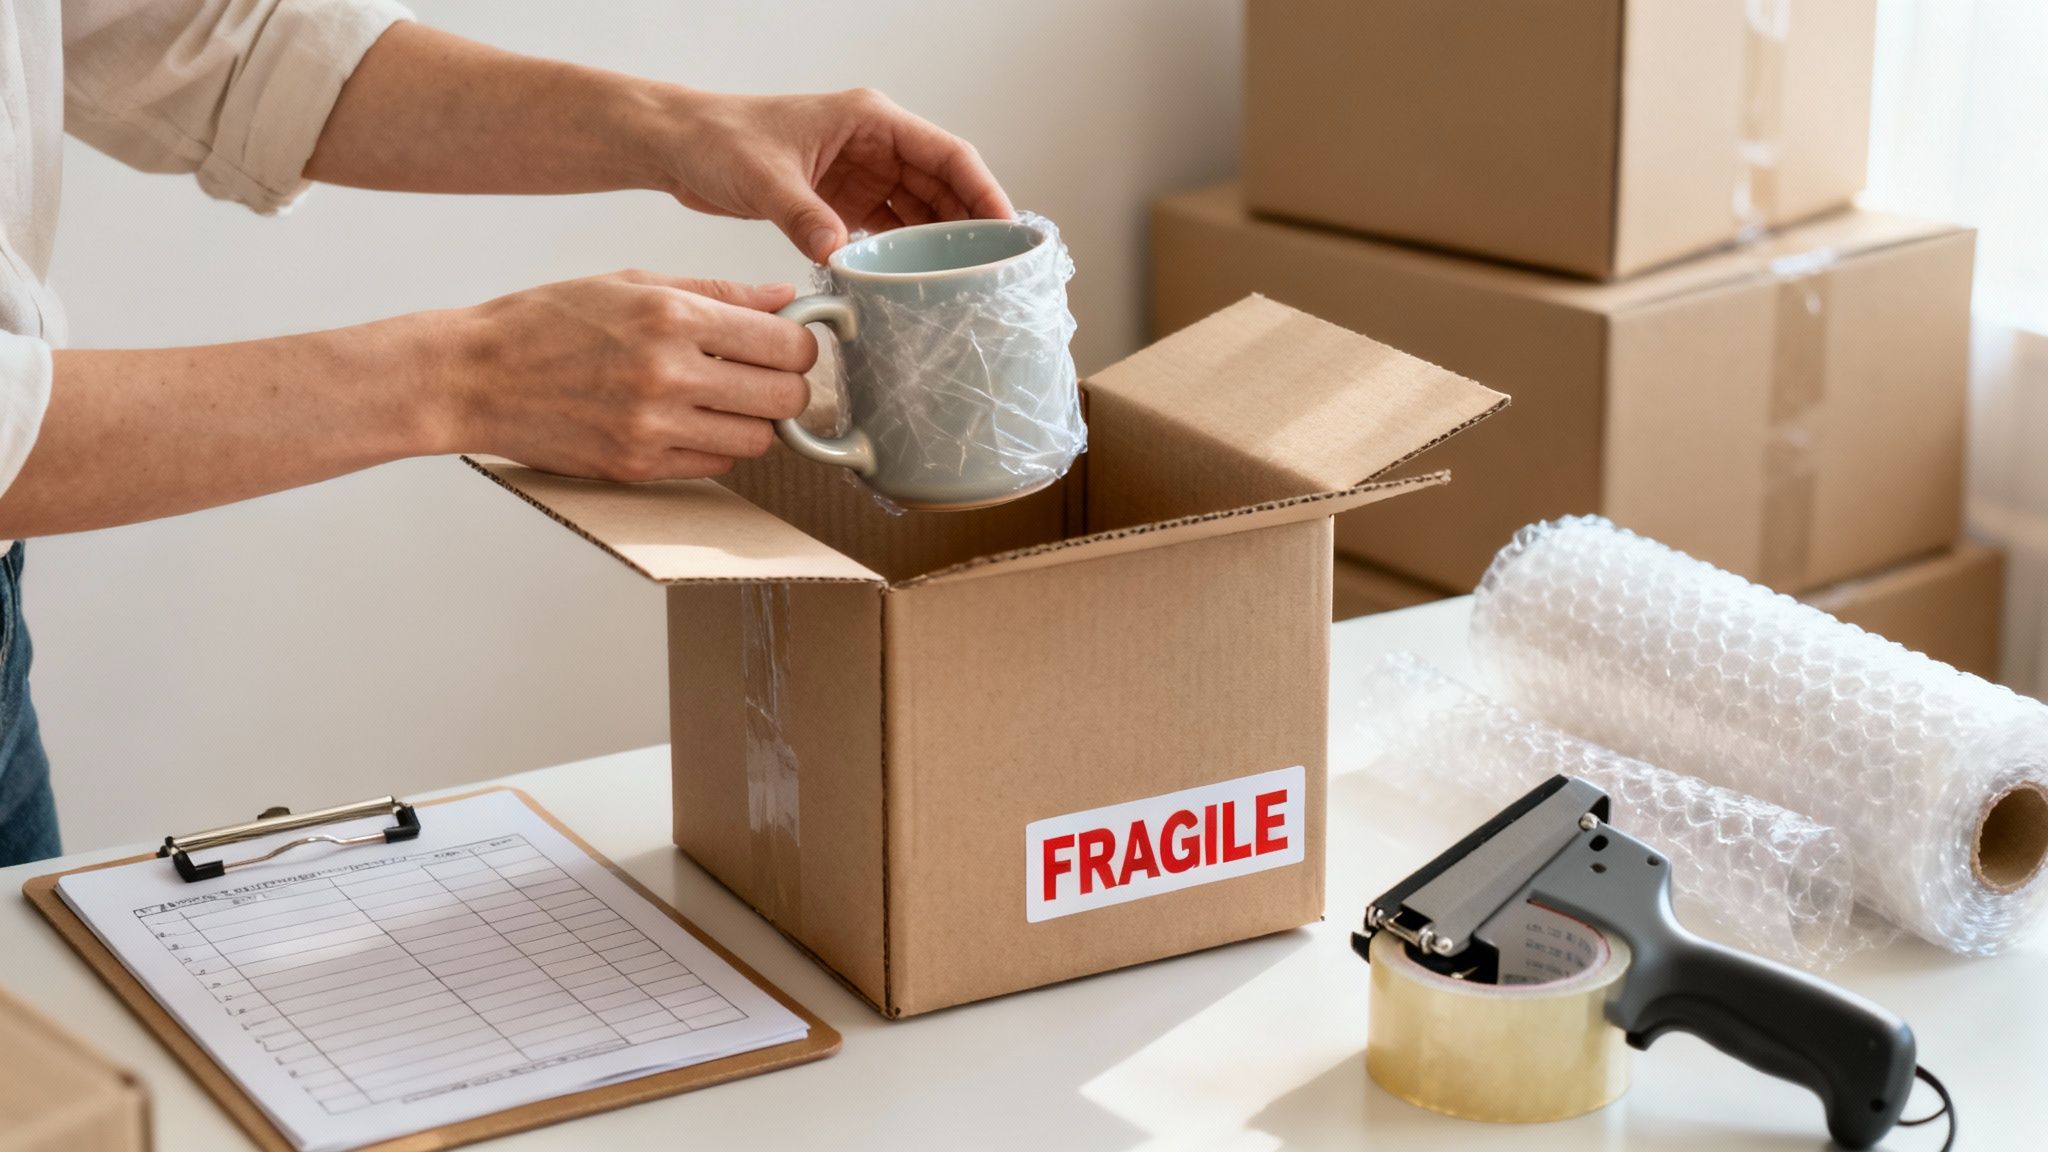
Moving can be incredibly stressful, but protecting your most delicate possessions doesn't have to add to the chaos. The real secret is walking into the task with a clear plan, not just a messy pile of boxes and tape. It’s time to forget the common DIY shortcuts that so often lead to heartbreak—like using old newspaper that can leave ink stains on your china, or leaving gaps in boxes that let your valuables crash into each other.
Instead, let’s focus on the professional methods that actually work. Think of this guide as your blueprint, giving you the confidence and the framework to turn a dreaded chore into a completely manageable part of your move.
The Mindset of a Professional Packer
Thinking like a pro mover is really about prioritizing preparation and proper technique over sheer speed. It’s about understanding the "why" behind each step we take. For instance, using smaller, sturdier boxes for heavy things like books or plates isn't just to make them easier to lift; it stops the box from collapsing under its own weight and crushing what's inside.
Here’s what that professional mindset really boils down to:
- Investing in Quality Supplies: This is absolutely non-negotiable. Strong, double-walled boxes, clean packing paper, and good packing tape are your first and best line of defense.
- Wrapping Items Individually: Every single fragile piece needs its own protective cocoon. This is what prevents direct contact and friction—the main culprits behind scratches, chips, and cracks.
- Creating a Shock-Absorbent Core: The goal inside every box is to eliminate all movement. When you fill every void with cushioning material, you create a solid, stable block that can handle the bumps and jostles of the road.
To pull off a truly smooth and stress-free relocation, it helps to understand the bigger picture. We recommend looking over some general tips on moving house packing alongside these specific techniques for your fragile stuff. This foundational knowledge helps you organize the whole process, not just one part of it.
A well-packed box is a silent box. If you can hear items shifting or clinking when you gently shake it, it's not ready for the moving truck. Go back and add more cushioning.
Avoiding Common Packing Pitfalls
So many people learn how to pack fragile items for moving through trial and error, which can be an expensive and heartbreaking way to learn. One of the most common mistakes is underestimating the sheer amount of packing paper you’ll need. Trust me, you'll always need more than you think. Another classic error is placing heavy items on top of lighter ones, which is a surefire way to crush delicate objects below.
For those of you tackling a bigger relocation, applying these principles correctly is even more critical. If that’s you, you might be interested in our guide on planning a successful cross-country move for that broader perspective.
Gathering Your Essential Packing Arsenal
Let’s be honest: a successful, damage-free move isn’t just about careful handling. It all starts with the right supplies. You wouldn't try to cook a five-star meal with subpar ingredients, and the same logic applies here. The quality of your packing materials is the first and most important line of defense for your valuables.
This is about more than just grabbing any old box and a roll of tape. It’s about building a professional-grade toolkit that will save you the headache and expense of replacing broken items down the road.
Choosing Your Boxes and Cushioning
Here’s one of the most common mistakes I see: people think all cardboard boxes are the same. That single-walled box from the grocery store isn't going to cut it for your heavy dishes or delicate collectibles. They buckle and crush the second they get stacked in a moving truck, which is a recipe for disaster.
You have to be strategic. Once you have a game plan, start gathering quality moving boxes designed for the job.
- Dish Pack Boxes: These are the unsung heroes of any kitchen pack. Made from heavy-duty, double-walled corrugated cardboard, they offer serious strength and crush resistance. They’re your go-to for plates, bowls, and anything heavy and breakable.
- Cell Dividers: If you're packing glassware, these cardboard inserts are non-negotiable. They create individual compartments inside the box, preventing glasses from clinking together—the number one cause of chips and cracks during a move.
- Specialty Boxes: For big, awkward items like mirrors, framed art, or flat-screen TVs, you absolutely need specialty picture boxes. They provide a snug fit that stops things from bending and protects those vulnerable corners from getting dinged.
The Great Debate Paper vs Bubble Wrap
Choosing the right cushioning is just as critical as picking the right box. Don't fall into the trap of using old newspaper, either. The ink can easily transfer and permanently stain things like unglazed pottery or fine china.
Your workhorse here should be clean, ink-free packing paper. It’s flexible, affordable, and gives you a great first layer of protection. Bubble wrap, on the other hand, is for when you need a higher level of shock absorption for extremely fragile or hollow items. A good rule of thumb is to use smaller bubbles for smaller items and the larger bubbles for bigger pieces like vases or lamps.
A smart packing strategy uses both. I always wrap items first in packing paper to create a smooth, protective layer, then add a layer of bubble wrap for that extra cushioning against inevitable bumps and drops.
To help you get started, here's a quick-reference guide to the materials you'll definitely want on hand.
Essential Packing Supplies and Their Uses
| Material | Primary Use | Pro Tip |
|---|---|---|
| Dish Pack Boxes | Heavy, fragile items like plates, bowls, and small kitchen appliances. | Pack heavier items on the bottom and lighter ones on top to prevent crushing. |
| Cell Dividers | Stemware, glasses, mugs, and other drinkware. | Wrap each glass in a sheet of packing paper before placing it in a cell for maximum protection. |
| Packing Paper | Wrapping individual items to prevent scratches and provide basic padding. | Crumple it up to fill empty spaces in boxes; this stops items from shifting around. |
| Bubble Wrap | Extra shock absorption for extremely delicate items like figurines or vases. | Tape the bubble wrap in place so it doesn’t unravel during transit, but don't tape it directly to the item's surface. |
| Packing Tape | Securing the bottom and top of every box. | Use the "H-Tape" method: one strip across the middle seam and one strip along each side seam for a stronger seal. |
| Permanent Markers | Labeling boxes with contents, room designation, and handling instructions. | Use different colored markers for different rooms to make sorting at your new home faster. |
Having these key supplies ready to go makes the entire packing process smoother and far more effective.
The Final Touches Tape and Labels
Finally, don't skimp on packing tape and clear labels. A cheap roll of tape can lose its grip mid-move, causing a box to burst open at the worst possible moment. Invest in a strong, wide packing tape to securely seal every box, top and bottom.
Proper labeling is how you communicate with your movers (or your friends who are helping). Mark every box with breakables as "FRAGILE" in big, bold letters on at least two sides. Use arrows to show "This Side Up," especially for things like glassware. It’s a simple step that makes a huge difference. In fact, logistics studies show that clearly labeling boxes 'FRAGILE' with arrows boosts handling care by 80%. This small effort significantly reduces the risk of damage, which is crucial when you consider that over 27% of people report broken valuables during DIY moves.
By assembling the right arsenal, you’re not just packing boxes; you’re building a system of protection. For more in-depth strategies, check out our guide on packing like a pro with essential checklists.
Mastering Proven Item-Specific Packing Techniques
You can't pack your grandmother's fine china the same way you pack your flat-screen TV. It just doesn’t work. A one-size-fits-all approach is a recipe for disaster when it comes to fragile items, and learning how to pack fragile items for moving really comes down to knowing the specific weaknesses of each piece.
This is where the pros have a serious edge—we’ve developed a playbook for just about everything you can imagine. Let's walk through that playbook so you can tackle your most delicate belongings with the same confidence.
At its core, the process for every fragile item is pretty straightforward. You need a solid box, the right kind of cushioning, and a secure seal.
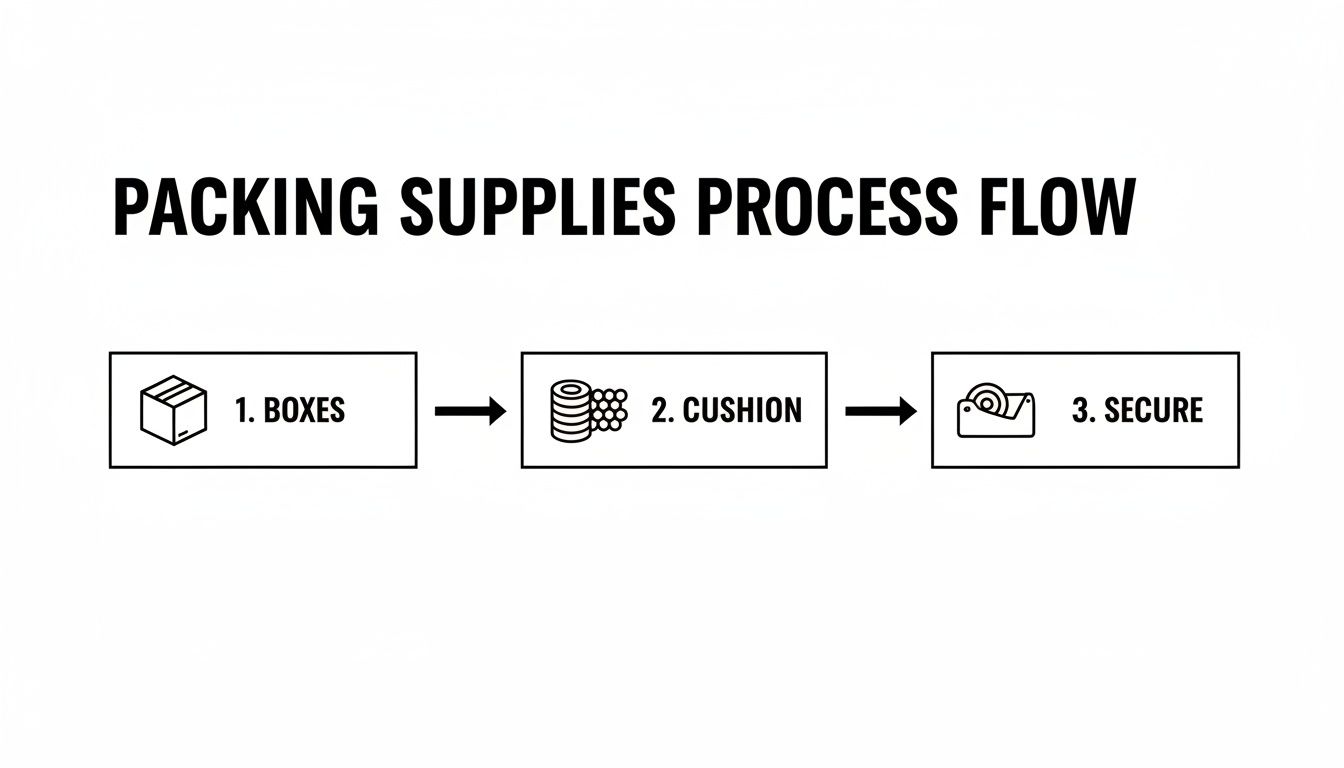
Think of these three steps as an interconnected system. A great box is useless without proper padding, and great padding won't help if the box isn't sealed tight. Get all three right, and your items will be safe and sound.
Securing Your Dishes and Glassware
Let's be honest, the kitchen is usually the room everyone dreads packing. It’s full of breakable, oddly-shaped stuff that seems designed to make moving difficult. But with the right technique, it's totally manageable. The main goal here is to stop things from rattling around and putting pressure on each other.
The single biggest mistake we see people make with plates is stacking them flat in a box, just like they sit in the cabinet. This puts all the weight and road vibration directly onto the plate at the bottom of the stack.
Instead, always pack your plates vertically, on their edge, almost like you’re filing records in a crate. This simple shift in orientation distributes pressure evenly and drastically cuts the risk of anything cracking.
Here’s the method we use every day:
- Wrap Individually: Start by laying a single plate in the middle of a few sheets of packing paper. Fold the paper over, then add another plate on top. Keep layering like this for about 3-4 plates.
- Create a Bundle: Once you have your small stack, take the whole thing and wrap it together in several more sheets of paper. Tuck the sides in snugly to make a tight, padded packet.
- Pack Vertically: Carefully place the bundle on its edge inside a sturdy, double-walled dish pack box. Keep making bundles and packing them in tightly next to each other.
For glasses, mugs, and especially stemware, the trick is to add internal support. Crumple up some packing paper and gently stuff it inside the bowl of a wine glass or mug. This prevents it from being crushed from the outside.
The long, delicate stems on wine glasses are their weakest point. After stuffing the bowl, wrap the entire glass in paper, giving extra attention and padding around the stem. Place them standing upright in a box that has cardboard cell dividers. Never, ever lay stemware on its side. For a more detailed guide, you can learn more about packing dishes for moving in our detailed article.
Protecting Valuable Electronics
Your electronics are not only expensive but also sensitive and weirdly shaped. Ideally, you’d use the original boxes, but who actually keeps those? No worries—you can create an equally safe alternative.
The strategy for electronics is twofold: you need to stop any moving parts from shifting around and protect any fragile surfaces like screens. Before you even think about wrapping, get those cords under control. Unplug every cable, coil it up, and use a piece of painter's tape to label what it belongs to. You’ll thank yourself when you’re setting everything back up.
If an item has moving parts, like the tonearm on a record player, use tape or a twist tie to secure it.
Once that’s done, follow these steps:
- First Layer: Wrap the entire device in a layer of bubble wrap. A key tip for screens: make sure the bubble side faces out. This prevents the bubbles from leaving little imprints on the glass.
- Add Padding: Create a thick, soft bed of crumpled packing paper at the bottom of a strong, well-fitting box.
- Position and Fill: Set the wrapped electronic inside the box. Now, meticulously fill every single gap around it with more crumpled paper, packing peanuts, or foam. The goal is to make sure the item cannot move at all.
For a big item like a flat-screen TV (without its original box), your best bet is to first wrap it in a soft moving blanket. Then, slide it into a specialty telescoping TV or mirror box. This gives it the rigid, puncture-proof shell it needs.
Handling Artwork and Mirrors Safely
Anything large, flat, and covered in glass—like mirrors or framed art—is incredibly vulnerable to cracking. The game plan is all about protecting that glass surface and reinforcing the corners, which are almost always the first point of impact.
Here's a simple trick we always use for glass surfaces: place a large "X" of painter's tape across the glass from corner to corner. No, this won't magically stop it from breaking if it takes a hard hit. What it will do is hold the shards together if it does crack, preventing them from shifting and slicing up your artwork or the frame.
After taping, it’s time to wrap.
- Corner Protection: Use foam or cardboard corner protectors designed for frames. If you don't have any, you can make your own by folding thick pieces of cardboard and taping them securely over each corner.
- Full Wrap: Cover the entire piece in a few layers of bubble wrap and tape it down. For very valuable art, consider wrapping it first in glassine paper—it's acid-free and will protect the surface from moisture.
- Boxing: Slide your wrapped piece into a picture or mirror box that’s the right size. These are usually flat and sometimes come in multiple pieces that fit together. If there's any wiggle room inside, fill the space with crumpled paper so it can’t shift.
Finally, label these boxes clearly on all sides with "FRAGILE – GLASS" and draw arrows pointing up. This tells your movers exactly how to handle it and to never, ever lay it flat. By tailoring your approach like this, you turn a stressful job into a series of manageable steps.
The Art of Boxing, Cushioning, and Labeling

Alright, you’ve individually wrapped your fragile items. That’s a huge step, but the job isn't done yet. How you actually place them in the box and seal it up is what separates a successful pack from a heartbreaking mess of broken heirlooms.
Think of the box as more than just a container; it's a protective vessel. Its job is to absorb shock and, most importantly, prevent anything from shifting around. So many people get this part wrong—they’ll carefully wrap a glass, toss it in a box with a few others, and call it a day. Every bump in the road turns that box into a demolition derby.
The Cushion-Pack-Cushion Method
At its core, professional packing relies on a simple but incredibly effective technique we call the "cushion-pack-cushion" method. It’s a three-part system designed to create a shock-absorbent nest for your belongings, making sure nothing can vibrate, shift, or knock against its neighbor.
First things first, create a generous bed of cushioning at the bottom. Crumple up several sheets of packing paper to build a soft base that’s at least four inches deep. This is your first line of defense if the box gets dropped or handled roughly.
Next, start placing your heaviest wrapped items on this cushioned layer. Fit them together strategically, almost like a puzzle, to minimize any large gaps between them. As you build up, remember the golden rule: heaviest at the bottom, lightest at the top.
Finally—and this is the part people often skip—fill every single void. Stuff more crumpled packing paper, packing peanuts, or even soft linens into all the empty spaces around, between, and on top of your items. Before you seal it, the box should feel firmly packed right to the brim.
Pro Tip: Before you tape a box shut, give it a gentle shake. Can you hear or feel anything moving inside? If so, it’s not ready. Open it back up and add more cushioning until everything is completely snug and immobile.
This methodical approach is non-negotiable. Why? Because impact damage accounts for a staggering 45% of all moving claims involving fragile items. Professionals use a similar strategy called 'controlled float packaging,' which is proven to slash this risk by 85% by essentially creating a buffer zone that absorbs impacts. It's the same reason double-boxing high-value art is so effective—you’re creating a box-within-a-box shock absorber.
Getting the Box Weight and Density Just Right
Another common mistake is packing a box that's either way too heavy or practically empty. An overpacked box is a recipe for disaster. It’s a nightmare to lift, more likely to be dropped, and the bottom could give out entirely. As a rule of thumb, any box tipping the scales over 40 pounds is too heavy for one person to handle safely.
But an underpacked box is just as bad. A half-full box, even one with decent cushioning, is just waiting to be crushed when other boxes are stacked on top of it in the moving truck. It can trigger a domino effect, destroying everything underneath.
Your goal is to pack each box so it feels solid and full, but not dangerously heavy.
- For Heavy Things: Always use smaller boxes for items like dishes, books, or small kitchen appliances.
- For Lighter Things: Use larger boxes for bulky but lightweight items like lampshades or decorative pillows.
- Mix and Match: If a box of fragile items still feels a bit too light, top it off with non-fragile things like dish towels or linens to add density without adding much weight.
The Final Touch: Clear and Effective Labeling
Think of your labels as your direct line of communication with your moving crew. Vague or missing labels are an open invitation for things to be mishandled. A well-labeled box tells movers exactly what they need to know in a single glance.
Your labels should have three key pieces of information, written clearly on at least two sides of the box:
- Handling Instructions: Don’t be shy. Write "FRAGILE" in large, bold letters. Use arrows to clearly mark "THIS SIDE UP." This is absolutely critical for boxes containing anything from glassware to electronics.
- Contents: Be specific enough to be helpful. "Kitchen – Wine Glasses" or "Living Room – Picture Frames" helps the movers place things, but it also makes your life infinitely easier when it’s time to unpack.
- Destination Room: Clearly write which room the box belongs in at your new home. This simple step will save you hours of lugging boxes from room to room later on.
By mastering these boxing and labeling details, you complete the circle of protection around your most cherished belongings. It’s this final attention to detail that makes all the difference. For a deeper dive into specific techniques, like for your coffee cups, check out our guide on the 10 packing steps for packing mugs for a move.
When to Trust the Professionals for Your Move
Even if you have the best intentions and a solid plan for how to pack fragile items for moving, sometimes a DIY approach just isn't the smartest move. Deciding to hire professional packers isn't throwing in the towel; it's a strategic decision to protect your time, your sanity, and your most valuable belongings.
Knowing when to make that call is a huge part of a successful relocation. If you find yourself staring at a room full of delicate heirlooms and feeling totally paralyzed, that's a pretty clear sign. That kind of anxiety often leads to last-minute, rushed packing—which is a recipe for disaster.
Scenarios Demanding a Professional Touch
Some situations and items just raise the stakes, making professional expertise practically a necessity. A trained crew doesn't just bring muscle; they bring specialized knowledge and materials that the average homeowner simply doesn't have lying around. Ask yourself if your move involves any of these challenges.
- High-Value or Irreplaceable Items: Are you moving a grand piano, a fragile antique grandfather clock, or a collection of delicate sculptures? These pieces often demand custom crating, specialized handling equipment, and an expert understanding of their unique weak points.
- Large, Awkward Pieces: We’ve all seen it. Massive mirrors, heavy glass tabletops, and large-scale artwork are notoriously difficult to pack and move safely. Professionals use specific techniques, like building custom crates or using telescoping picture boxes, to make sure these items are completely immobilized and protected from stress fractures.
- A Tight Timeline: Life happens. A sudden job offer or a quick closing date can leave you with mere days, not weeks, to get ready. Professional packers can knock out in a single day what might take you an entire week, all while keeping their work meticulous. That kind of speed and efficiency can be a lifesaver.
The real value of a professional packing service is the transfer of risk. You're not just paying for labor; you're investing in accountability, experience, and the peace of mind that comes from knowing your cherished belongings are in expert hands.
The Tangible Benefits of Hiring Experts
Bringing in a team like Family Movers Express LLC offers several concrete advantages that go way beyond saving you from the physical labor. It's an investment that often pays for itself by preventing heartbreaking and costly damage.
For starters, pros show up with an entire arsenal of high-quality materials. They know exactly which type of box, how much cushioning, and what kind of wrap is needed for everything, from your grandmother's fine china to your complex electronics. This takes all the guesswork out of it and ensures every single possession gets the specific protection it needs.
Plus, a trained crew works with an efficiency that’s almost impossible to replicate on your own. They have a system, a rhythm, and the experience to pack up rooms quickly and logically. This not only speeds up the whole moving process but also ensures boxes are packed for maximum safety and stability inside the moving truck. For a deeper dive into what this process looks like, explore the benefits of hiring professional packers and movers in our comprehensive guide.
Making the Smart Financial Decision
While there's an upfront cost, you have to weigh it against the potential cost of not hiring help. Think about the replacement value of your fragile items. Could you afford to replace a shattered antique vase, a cracked flat-screen TV, or an entire set of broken wedding crystal?
Even more importantly, think about the value of your own time and energy. All those hours spent wrapping, boxing, and labeling could be used for other critical moving tasks—coordinating logistics, changing your address, or just saying goodbye to friends and neighbors. By outsourcing the most time-consuming and stressful part of the move, you free yourself up to manage the bigger picture. In the end, trusting the professionals is often the most cost-effective decision you can make.
Common Questions About Packing Fragile Items
Even with a solid game plan, you're bound to run into a few specific questions when you're staring down a mountain of breakables. It’s one thing to know the general rules, but it's another thing entirely to figure out what to do with your own delicate belongings. Let’s walk through some of the most common things we get asked by clients, so you can tackle these final details with confidence.
These are the real-world sticking points, the little details that can make or break the safety of your valuables. Getting clear, straightforward answers is the best way to prevent some seriously costly mistakes.
Can I Really Not Use Newspaper to Wrap My Dishes?
We get this one a lot, and the answer is a hard no. While it seems like a clever way to save a few bucks, the ink on that newsprint can easily smudge and transfer right onto your dishes. This is especially a problem for anything with a porous surface, like unglazed pottery or fine china, leaving you with stubborn grey marks that are a total pain to scrub off.
Trust me, spending a little on a bundle of clean packing paper is one of the smartest investments you can make. It’s a small price to pay to guarantee you won't spend your first day in your new home trying to de-stain your entire dinnerware set.
What Is the Single Biggest Packing Mistake to Avoid?
Without a doubt, it’s leaving empty space inside the box. People will do an amazing job wrapping every single glass and plate, but then they forget to fill in all the little gaps between the items. That creates a void, and in a moving truck, that empty space allows everything to shift, vibrate, and slam into each other.
A well-packed box should be a silent box. If you give it a gentle shake and hear or feel anything moving around, you need more cushioning. That internal movement is what causes nearly all breakage during a move.
It’s a simple oversight that completely undermines all the careful wrapping you just did. Always, always stuff every last nook and cranny with crumpled paper or other padding until the box feels like a solid, unmoving block.
Are Specialty Boxes like Dish Packs Actually Worth the Money?
Absolutely, one hundred percent. These boxes aren't just a marketing gimmick; they're engineered to protect your most vulnerable items, and they are worth every single penny. A dish pack, for instance, is made from double-corrugated cardboard. That extra layer offers way more strength and crush resistance than a standard moving box.
Think of it as cheap insurance. The extra couple of dollars you spend on a specialty box is nothing compared to the financial—and emotional—cost of replacing a shattered family heirloom or a priceless piece of art. The same goes for picture and mirror boxes; they provide a snug fit that keeps things from bending and protects those fragile corners from getting dinged.
How Should I Pack My Flat-Screen TV Without the Original Box?
Okay, so you tossed the original box—don't panic. You can create a perfectly safe alternative with the right supplies. Your first step is to find a heavy-duty, double-walled box that’s just a little bit bigger than the TV itself. The best move is to buy a dedicated TV moving box from a supply store.
Once you have the box, wrap the entire TV in a thick moving blanket or several layers of large-bubble bubble wrap. Really go to town on it, paying extra attention to the corners. After you’ve placed it inside the box, pack crumpled paper or foam pieces tightly into all the surrounding space to make sure it can't move an inch. Finally, label the box on every single side with big, bold letters: "FRAGILE – TV", and draw arrows pointing up.
Feeling a bit overwhelmed or just don't have the time? The pros at Family Movers Express LLC can take all the packing stress off your plate, making sure every fragile item is protected with expert care. Get a free, no-obligation quote today!
Ready to protect your upcoming move?
Click Here to Fill Out Our Quick Form & Secure Your Instant Quote!
